 Autogenerate and store images with Rmagick and Imagemagick with ActiveStorage
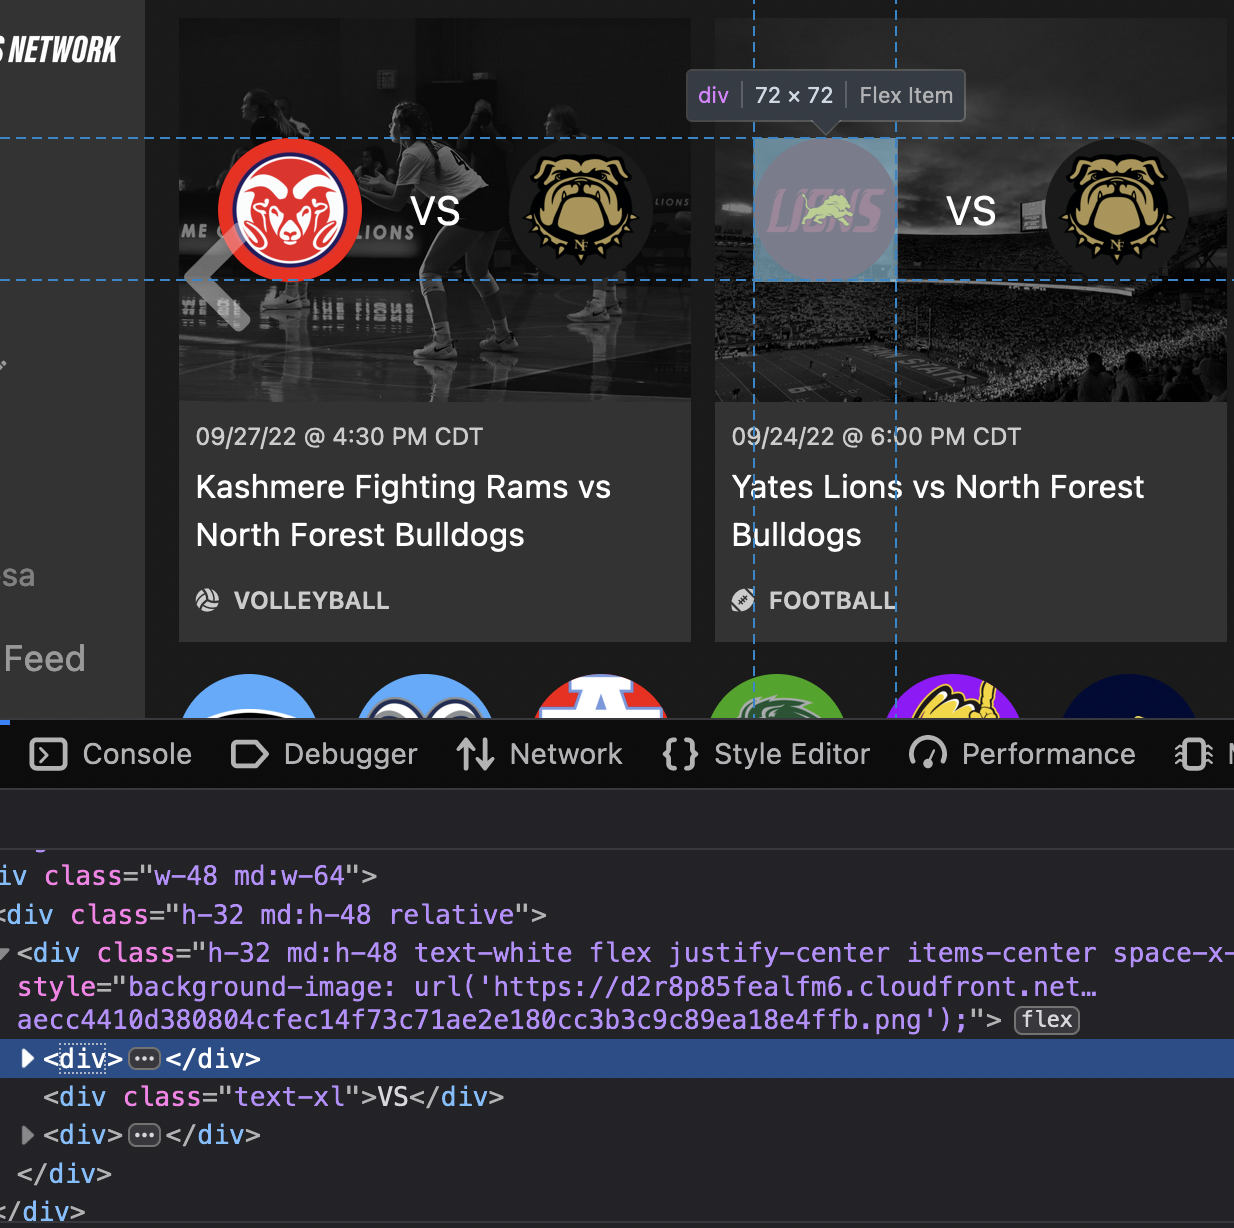
Imagine an app for live streaming sports games (ESPN/Netflix/Twitch app).
On the homepage of the app you can see a list of sports games.
Each game has a preview image (thumbnail).
The thumnail should be composed of:
- a stadium background (different stadiums for different sports)
-
home_teamandguest_teamlogos - game
starts_attext - game
id
Right now the thumbnail is not one solid image.
It is a composite of images overlaying each other with HTML+CSS:
Now we want to generate an actual image thumbnail for each game and store it in the database.
This way we can utilize the generated image anywhere outside of our app (share on social, print posters, etc.)
To automatically generate and image we will use Rmagick.
To store and attach the image to a record, we will use ActiveStorage.
Rmagick is a Ruby library for interacting with Imagemagick - a powerful open source library for scripting images.
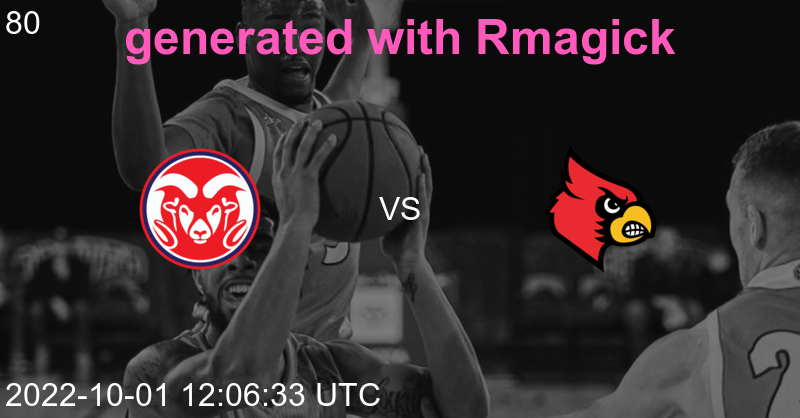
🚀 Final image that we will create:
📄 Images used:
Stadium:
Team 1 logo:

Team 2 logo:

⚠️ Before continuing, find a way to install rmagick on your machine. ⚠️
The below might not be enough:
bundle add rmagick
1. Generate new image #
For this, we can use the method new.
rails c
require 'RMagick'
include Magick
FileUtils.mkdir_p 'app/assets/images/generator'

# width, height
image = Image.new(256, 64) do |img|
  img.background_color = 'red'
end
image.write("app/assets/images/generator/red_rectangle.png")

image = Image.read('canvas:#ff5abb') do |img|
  img.size = '700x700'
end.first
image.write("app/assets/images/generator/pink_square.png")
red_rectangle.png

pink_square.png:

2. Overlay image above image #
For this, we will use the method composite.
📖 rmagick#composite (image overlay) docs
rails c
require 'RMagick'
include Magick
# read existing image
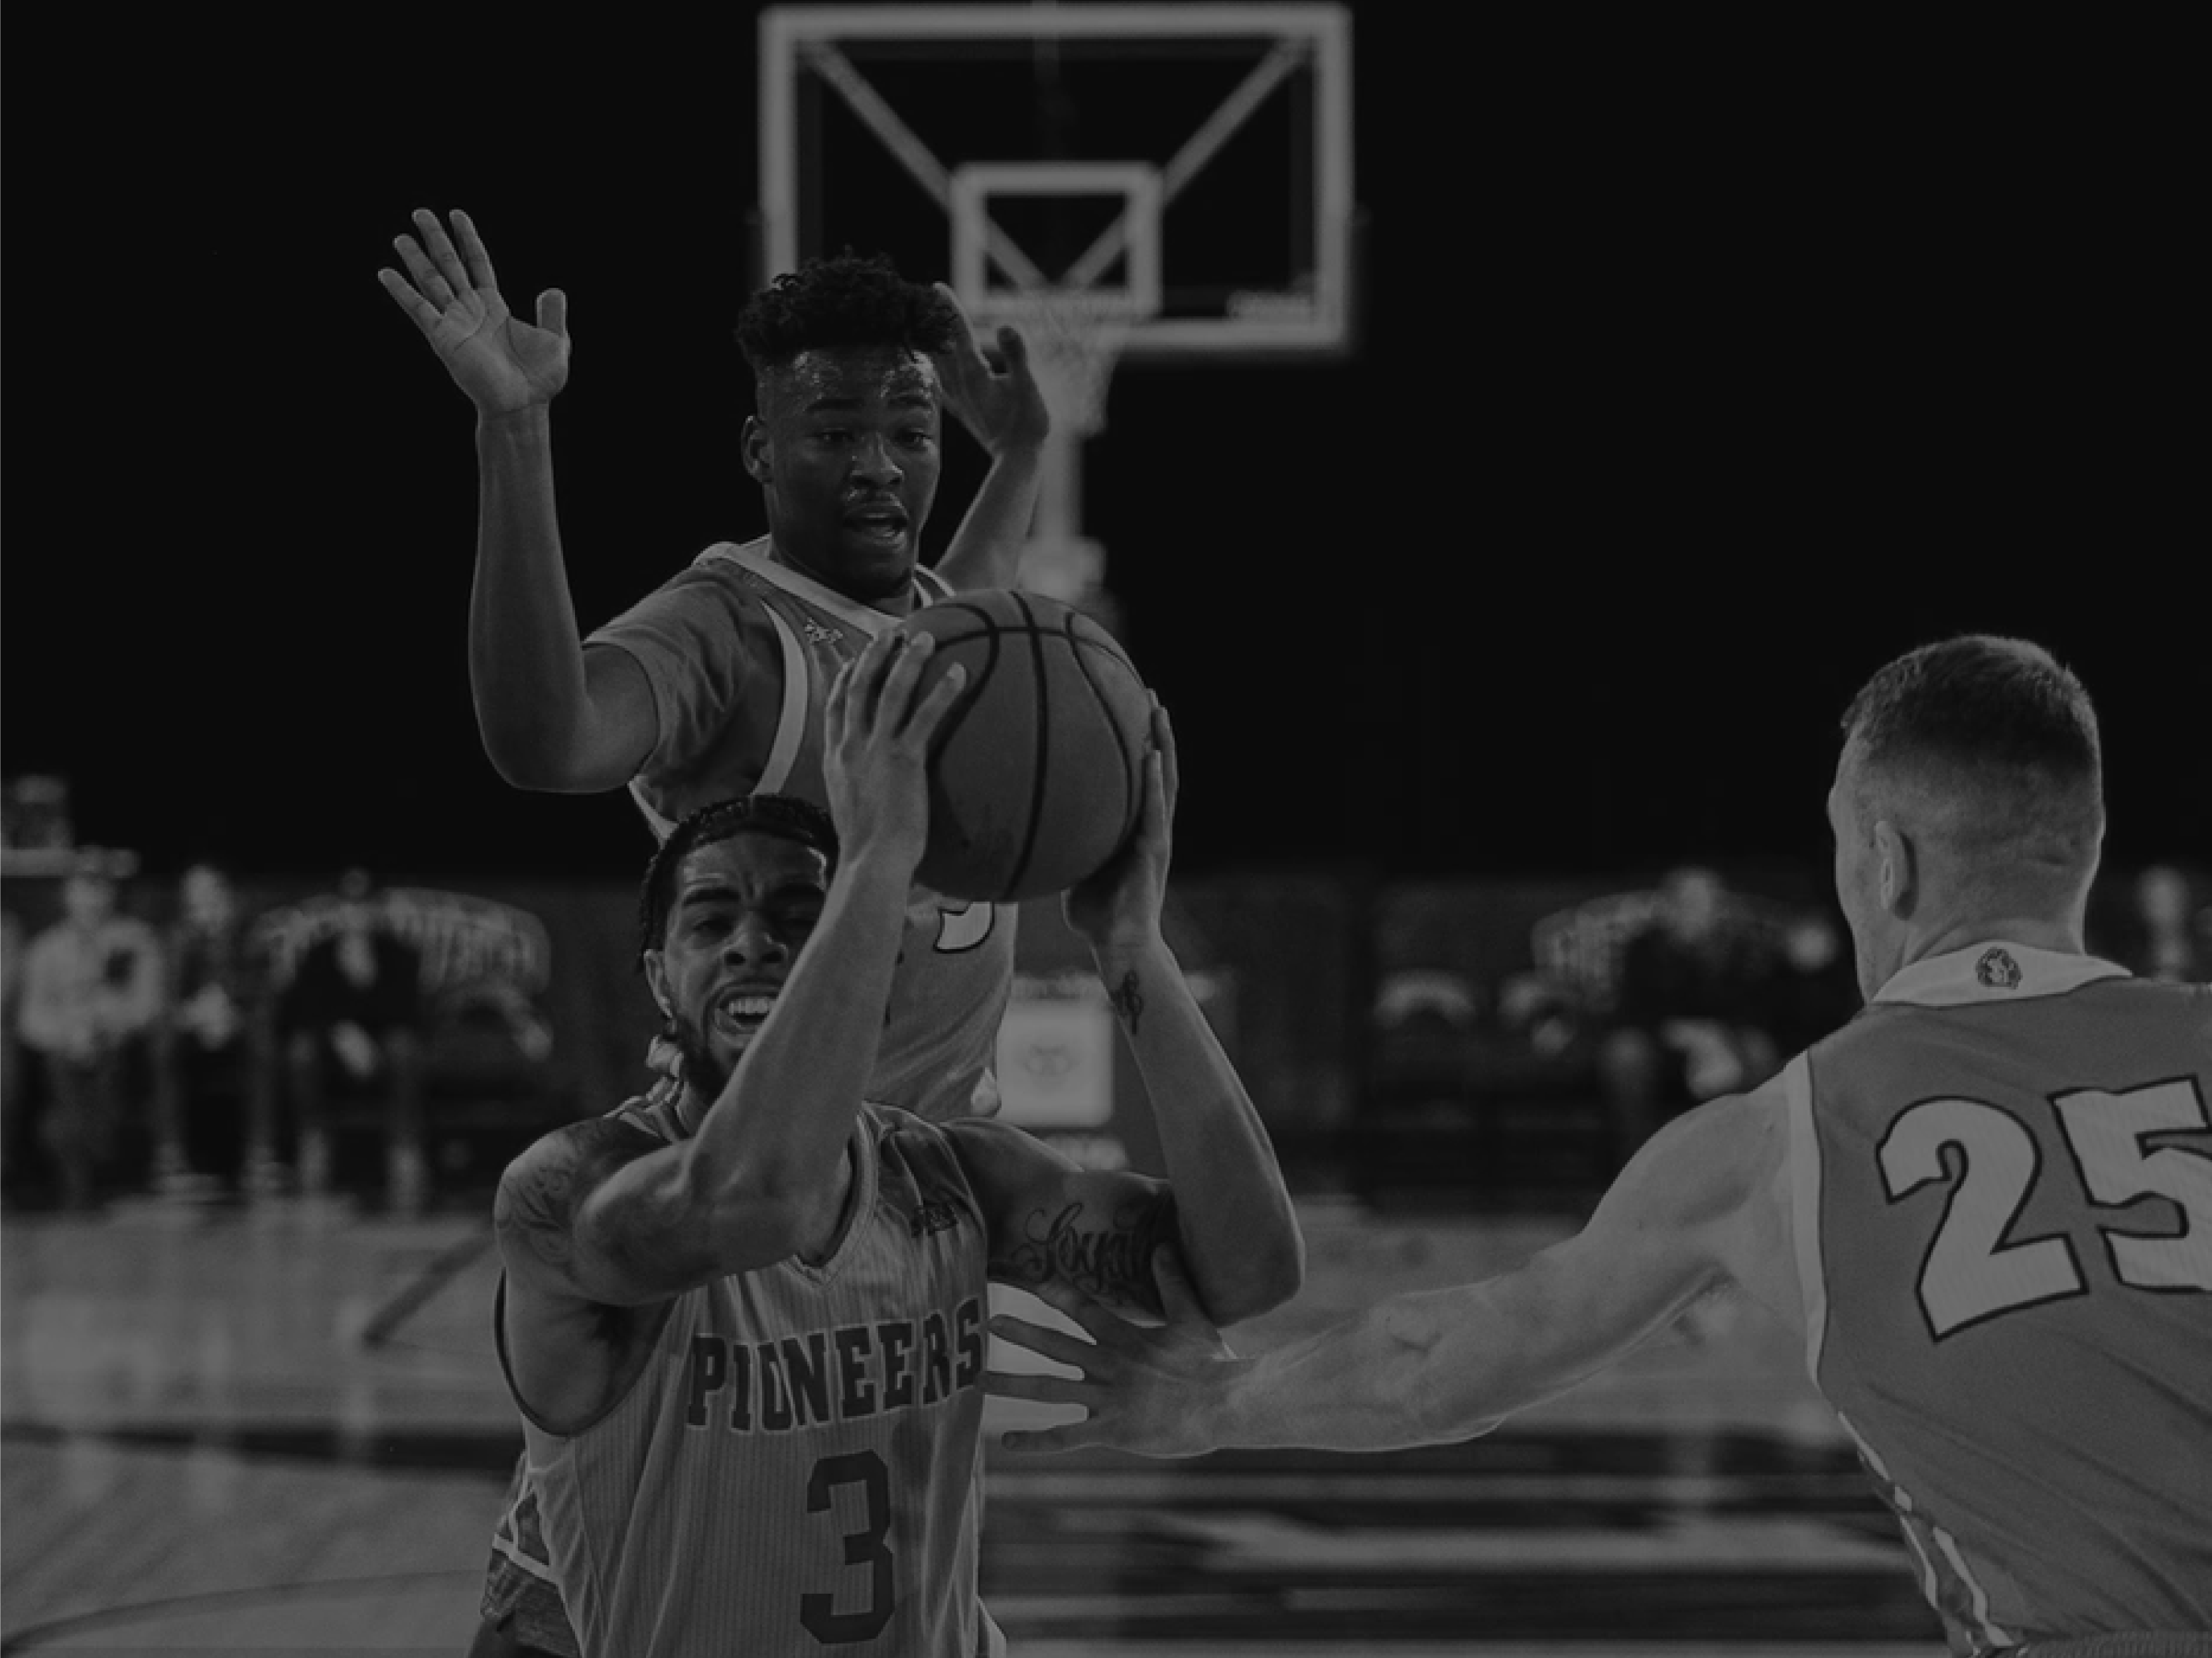
image_path = Rails.root.join('app/assets/images/boys_basketball.png')
image = Magick::Image.read(image_path).first
width = image.columns
height = image.rows
# image.write("app/assets/images/generator/image-basic.png")
# create gradient of the same size as above image
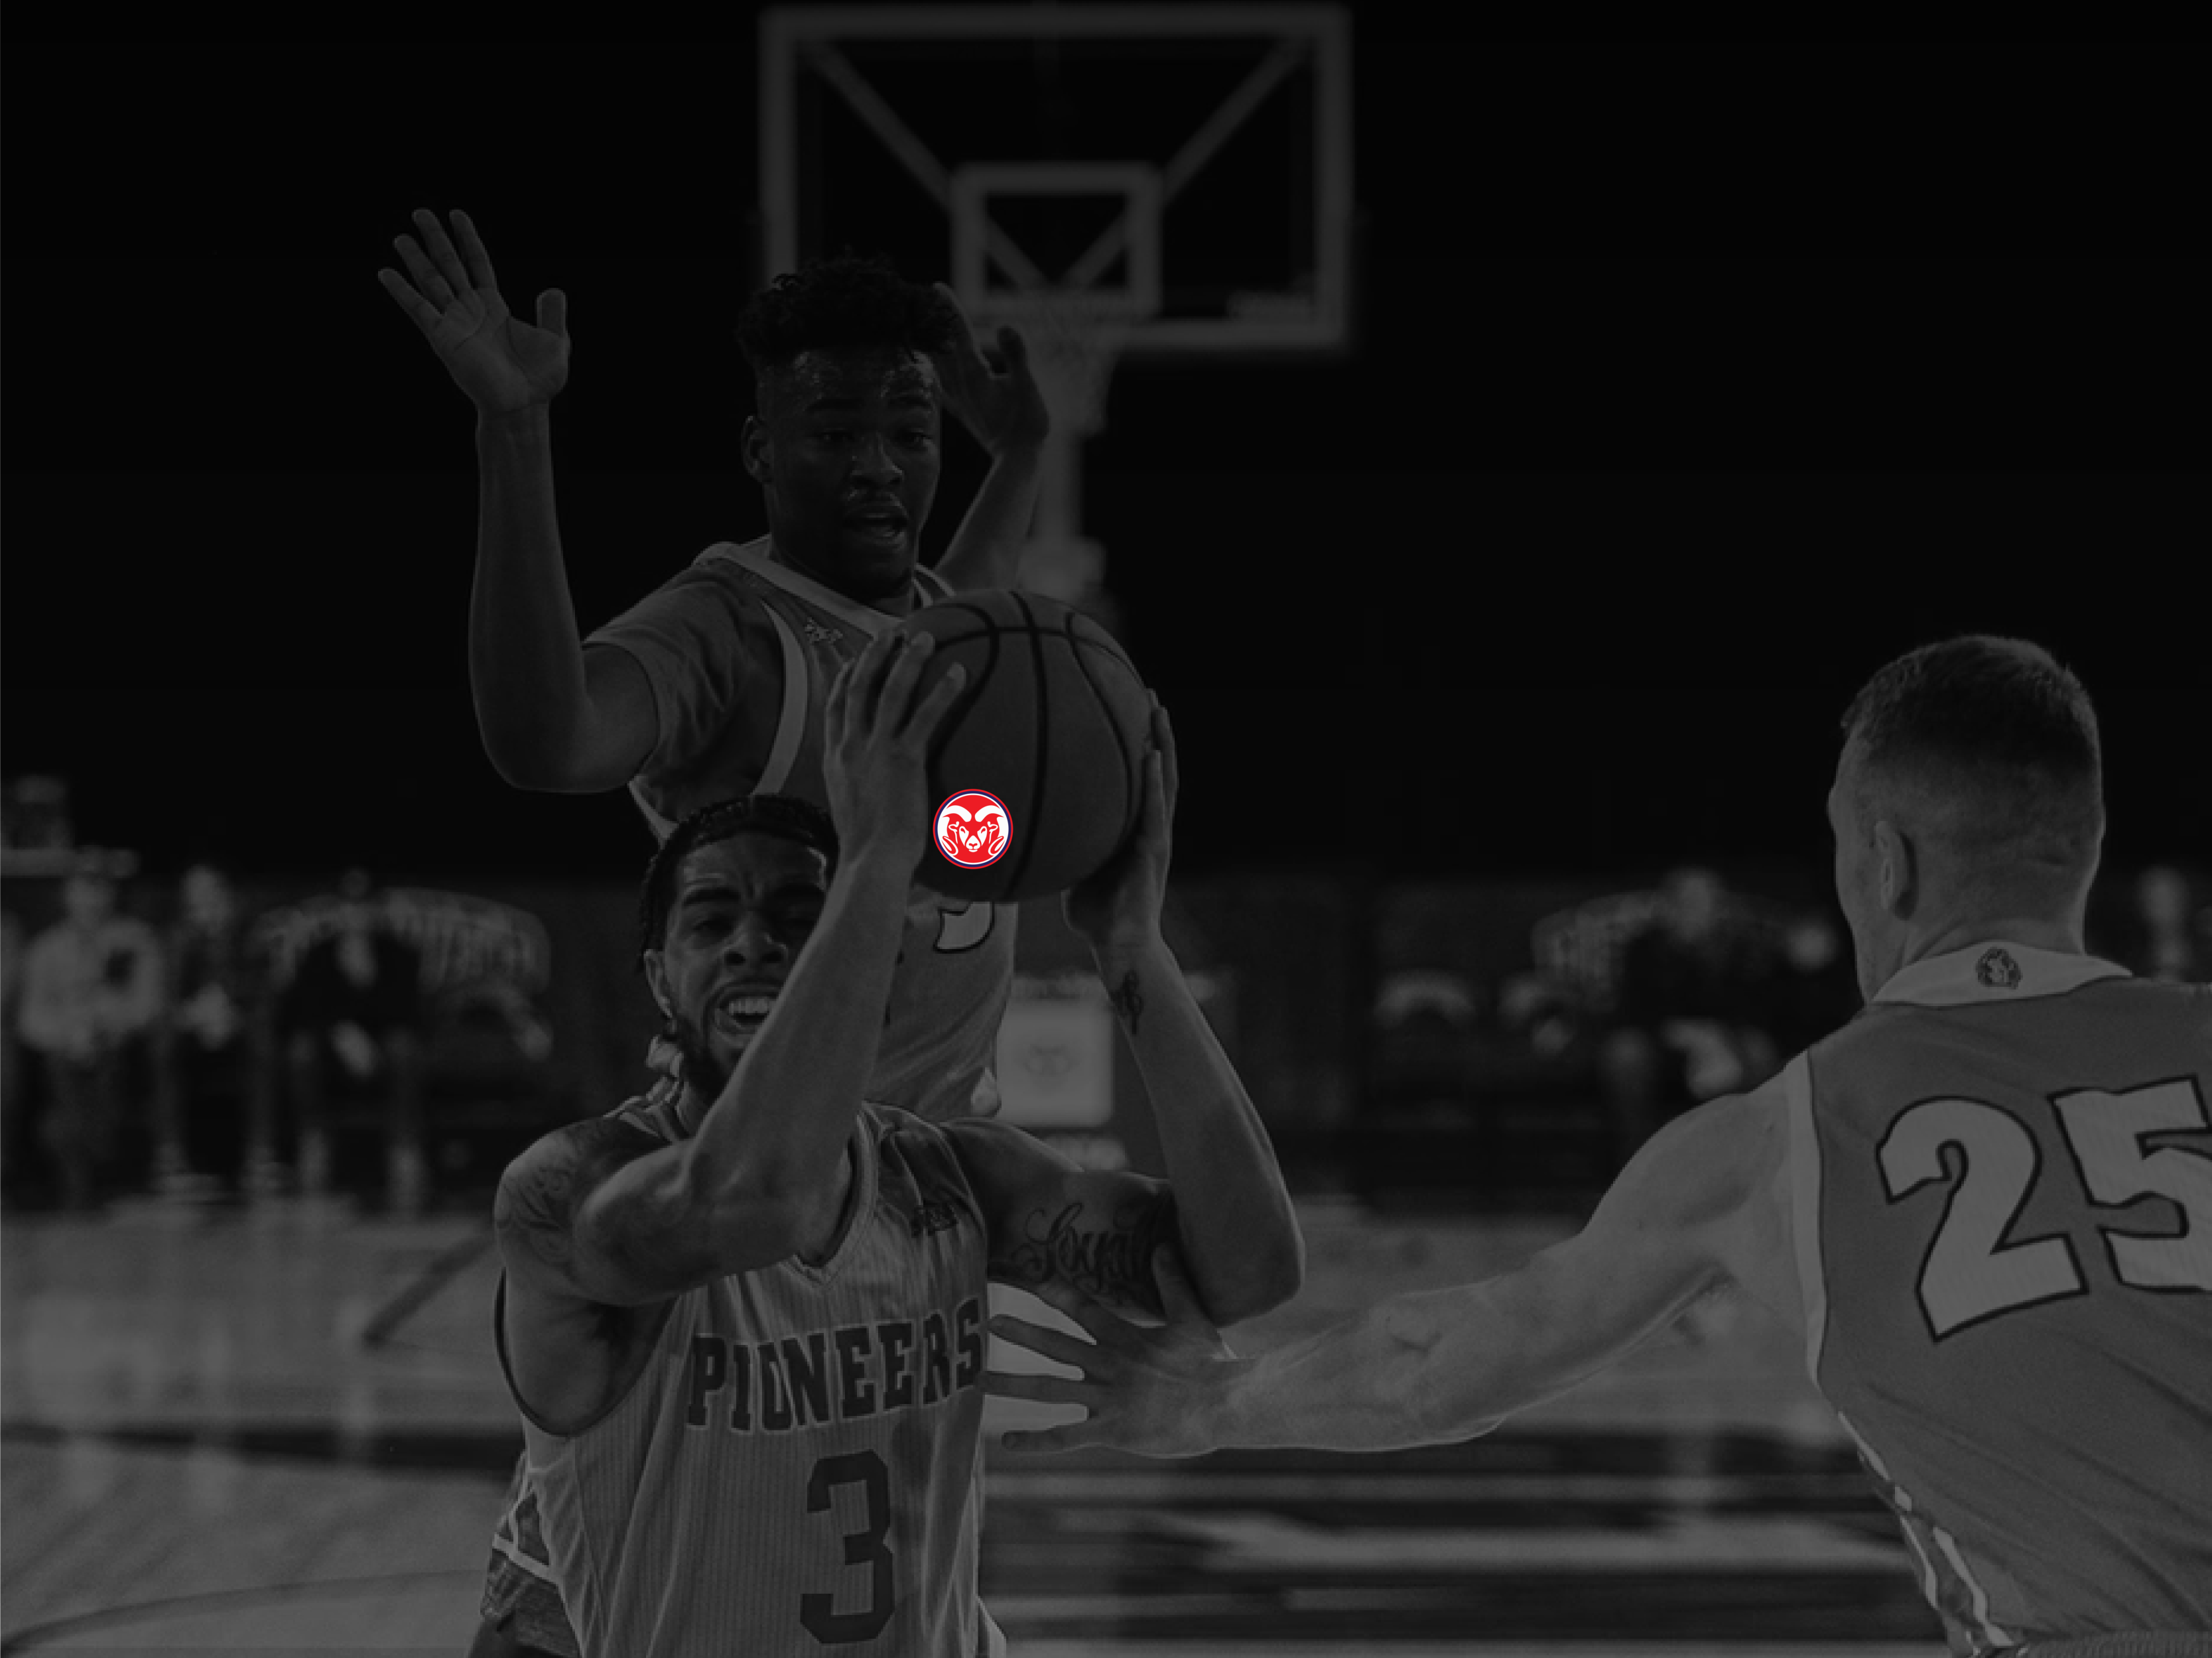
gradient = Magick::Image.read('gradient:rgba(0,0,0,0.7)-rgba(0,0,0,0.0)') do |img|
img.size = "#{width}x#{height}"
end.first
# gradient.write("app/assets/images/generator/gradient.png")
# overlay gradient over image
image = image.composite(gradient, 0, 0, OverCompositeOp)
# image.write("app/assets/images/generator/image-with-gradient.png")
# read another image, overlay image2 over image
image2_path = Rails.root.join('app/assets/images/Kashmere-Fighting-Rams.png')
image2 = Magick::Image.read(image2_path).first
image = image.composite(image2, CenterGravity, -200, 0, OverCompositeOp)
image.write("app/assets/images/generator/image-above-image-with-gradient.png")
image-above-image-with-gradient.png:
notice that the top is darker than the bottom;
notice the avatar 200px to the left from the center;
So, for composite you specify:
- main image
- image that will be added
- gravity
- move left/right by X pixels from gravity
- move down/up by Y pixels from gravity
- composite operator
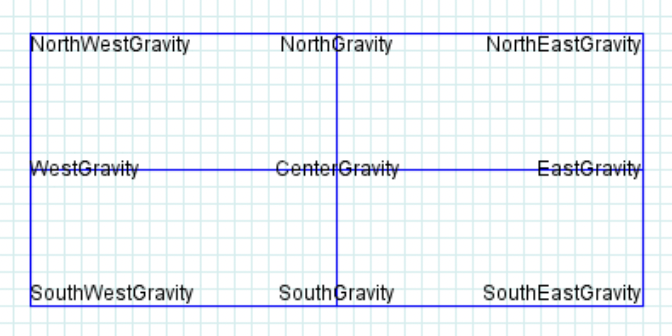
All available gravity options:
3. Overlay text above image #
For this, we will use the methods annotate with Draw:
rails c
require 'RMagick'
include Magick

# create a canvas to write on
image = Image.new(512, 256) do |img|
  img.background_color = '#FFDD00'
end

text = Magick::Draw.new
text.fill = '#0057B7'
text.pointsize = 48
text.gravity = CenterGravity
# 50px up Y axis = "-pt-5
text.annotate(image, 0, 0, 0, -50, 'Glory to Ukraine')
text.gravity = SouthEastGravity
text.pointsize = 16
# 5px padding X (left) and Y (top) = "pl-5 pt-5"
text.annotate(image, 0, 0, 5, 5, 'by @yarotheslav')

image.write('ukraine.png')
ukraine.png

Consider that the padding is calculate from gravity center 🙀
annotate also allows to assign text params in a block:
input_text = 'Glory to Ukraine'
# 0, 0, 0, 50 = width, height, x, y
text.annotate(image, 0, 0, 0, 50, input_text) do |txt|
  txt.pointsize = 48
  # txt.font_weight = BoldWeight
  txt.font_weight = NormalWeight
  txt.fill = '#ff5abb'
  txt.gravity = CenterGravity
end
4. Scale (resize) image #
rails c
require 'RMagick'
include Magick

image_path = Rails.root.join('app/assets/images/boys_basketball.png')
image = Image.read(image_path).first
# => PNG 3335x2500 3335x2500+0+0 DirectClass 8-bit 825kb
smaller_image = image.scale(0.5)
# => PNG 3335x2500=>1668x1250 1668x1250+0+0 DirectClass 8-bit
larger_image = image.scale(1.75)
# => PNG 3335x2500=>5836x4375 5836x4375+0+0 DirectClass 8-bit
px_scaled_image = image.scale(300, 100)
# => PNG 3335x2500=>300x200 300x200+0+0 DirectClass 8-bit

px_scaled_image.write("app/assets/images/generator/scaled-image.png")
disproportionally scaled image:

proportionally scaled image with calculation:
image_path = Rails.root.join('app/assets/images/boys_basketball.png')
image = Image.read(image_path).first

# calculation
width = image.columns
height = image.rows
new_width = 100
new_height = height*new_width/width
# => 74

proportionally_scaled_image = image.scale(new_width, new_height)
proportionally_scaled_image.write("app/assets/images/generator/proportionally_scaled_image.png")
Actually, you don’t need to do the above calculation if you use resize_to_fit.
Just specify one aspect ration based on which you want to scale the other one:
image.resize_to_fit(0, 75)
# => PNG 3335x2500=>100x75
image.resize_to_fit(100, 0)
# => PNG 3335x2500=>100x75

5. Crop image #
rails c
require 'RMagick'
include Magick

image_path = Rails.root.join('app/assets/images/boys_basketball.png')
image = Image.read(image_path).first

# initial image was too big. scale it to something standard
image = image.resize_to_fit(1668, 0)
# central crop
central_focus_crop = image.crop(CenterGravity, 800, 418, true)
central_focus_crop.write('central_focus_crop.png')
The true in the end is very important, as it forces further manipulations to be based on the new size.
The image was very big initially, so we scaled it down.
Next, we focused on the center of the image and cropped 800px width and 418px height (the ideal twitter size).
This kind of crop can help you standartize cropping images while always keeping focus on the center:

6. Final. The real world case: #
bin/rails g scaffold game starts_at:datetime sport home_team visiting_team
bin/rails active_storage:install
bin/rails db:migrate
# app/services/generate_thumbnail_service.rb
# event = Event.create(title: 'Madison Square Garden', description: 'VS')
# GenerateThumbnail.new(event)
class GenerateThumbnailService
  require 'RMagick'
  include Magick

  attr_reader :event

  def initialize(event)
    @event = event

    call
  end

  def call
    filename = create_image(event)
    # find & attach generated tmp image
    image_file_io = File.open("app/assets/images/generator/#{filename}.png")
    event.thumbnail.attach(io: image_file_io, filename:, content_type: 'image/png')
    # delete tmp file
    File.delete(image_file_io)
  end

  private

  def create_image(event)
    image_path = Rails.root.join('app/assets/images/boys_basketball.png')
    image = Magick::Image.read(image_path).first
    image = image.resize_to_fit(1000, 0)
    image = image.crop(CenterGravity, 800, 418, true)

    hero1_path = Rails.root.join('app/assets/images/Kashmere-Fighting-Rams.png')
    hero1 = Magick::Image.read(hero1_path).first
    image = image.composite(hero1, CenterGravity, -200, 0, OverCompositeOp)

    hero2_path = Rails.root.join('app/assets/images/Bellaire-Cardinals.png')
    hero2 = Magick::Image.read(hero2_path).first
    image = image.composite(hero2, CenterGravity, 200, 0, OverCompositeOp)

    text = Magick::Draw.new

    input_text = event.title.truncate(50)
    text.annotate(image, 0, 0, 0, 10, input_text) do |txt|
      txt.pointsize = 48
      txt.font_weight = BoldWeight
      txt.fill = '#ff5abb'
      txt.gravity = NorthGravity
    end

    input_text = event.description
    text.annotate(image, 0, 0, 0, 0, input_text) do |txt|
      txt.pointsize = 32
      txt.font_weight = NormalWeight
      txt.fill = 'white'
      txt.gravity = CenterGravity
    end

    input_text = event.created_at.to_s
    text.annotate(image, 0, 0, 5, 5, input_text) do |txt|
      txt.pointsize = 32
      txt.font_weight = NormalWeight
      txt.fill = 'white'
      txt.gravity = SouthWestGravity
    end

    input_text = event.id.to_s
    text.annotate(image, 0, 0, 5, 5, input_text) do |txt|
      txt.pointsize = 32
      txt.font_weight = NormalWeight
      txt.fill = 'white'
      txt.gravity = NorthWestGravity
    end

    filename = [event.model_name.human, event.id].join.downcase
    FileUtils.mkdir_p 'app/assets/images/generator'
    image.write("app/assets/images/generator/#{filename}.png")
    filename
  end
end
When an event is created, generate and attach the thumbnail:
# app/models/event.rb
class Event < ApplicationRecord
  has_one_attached :thumbnail, dependent: :destroy

  after_create do
    GenerateThumbnailService.new(self)
  end
end
Display the generated image in a view:
# app/views/events/_event.html.erb
<% if event.thumbnail.attached? %>
  <%= image_tag event.thumbnail %>
  <%#= event.thumbnail.blob.key %>
<% end %>
Result:
Other rmagick topics worth learning (that are not covered here):
- transperency (pixel overlay strategies)
- black & white
- write generated images directly to AWS S3
Useful resources:
- rmagick on Rubydoc
- official example: colors.rb of using rmagick
- another great article covering rmagick
Did you like this article? Did it save you some time?