 Deploy to DigitalOcean App Platform in Production
Decline of Heroku #
Heroku played an important role in my career as a software engineer: it let me easily and quickly deploy applications to production for free. This way I could showcase my app to the world, or compare how an app works locally vs in a production environment. It was so easy for anybody to have a prototype app!
If you wanted to upgrade and turn your free app into a real-world-ready app, you could buy the minimum paid tier for $5/mo (so that your app does not sleep after 30 min of inactivity). To have more than 10,000 lines in your database you would pay an additional $7/mo. So a total minimum of $12/mo to run a production app!
It was Freemium at it’s finest!
But in 2022 Salesforce (Heroku owner) decided to kill the free tier. As a result, This will limit thousands of learners from deploying their first app to production.
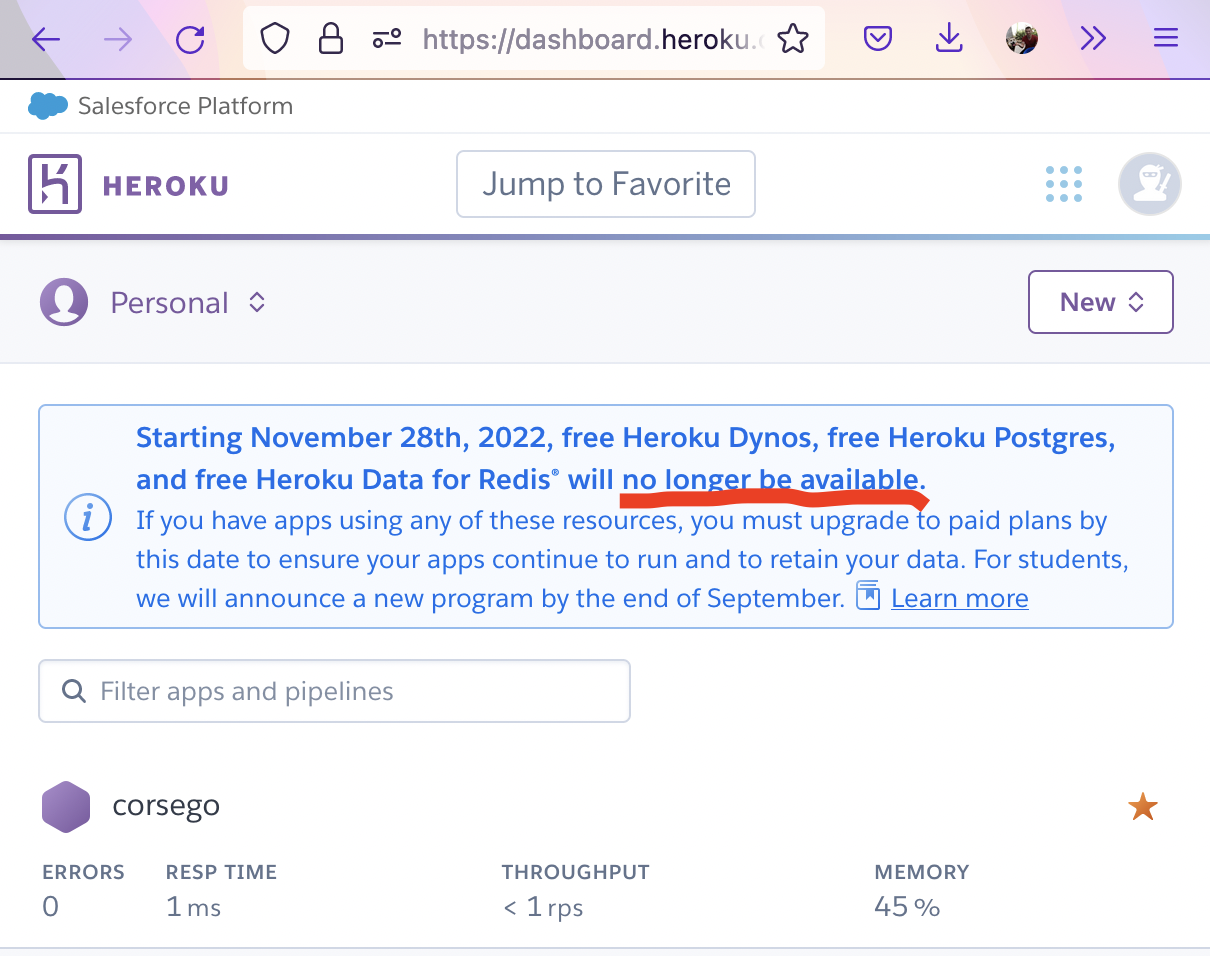
Without the free tier, I see no point in sticking with Heroku any more for the paid tiers.
My second best choice is DigitalOcean.
It has no free option, but it’s minimal paid tier is comparable to the one of Heroku. And it is relatively easy to set up!
In the end, the luxury of “outsourcing” your DevOps + cloud computing does come at a cost…
DigitalOcean: registration, saving money #
First of all, try to register on DigitalOcean only via a referral link!
That way you can get $200 credits to start with.
$200 referal link #
After registration, you will have to add a credit card or PayPal to use the platform. IMHO PayPal money is less liquid, so I always prefer to use it first.
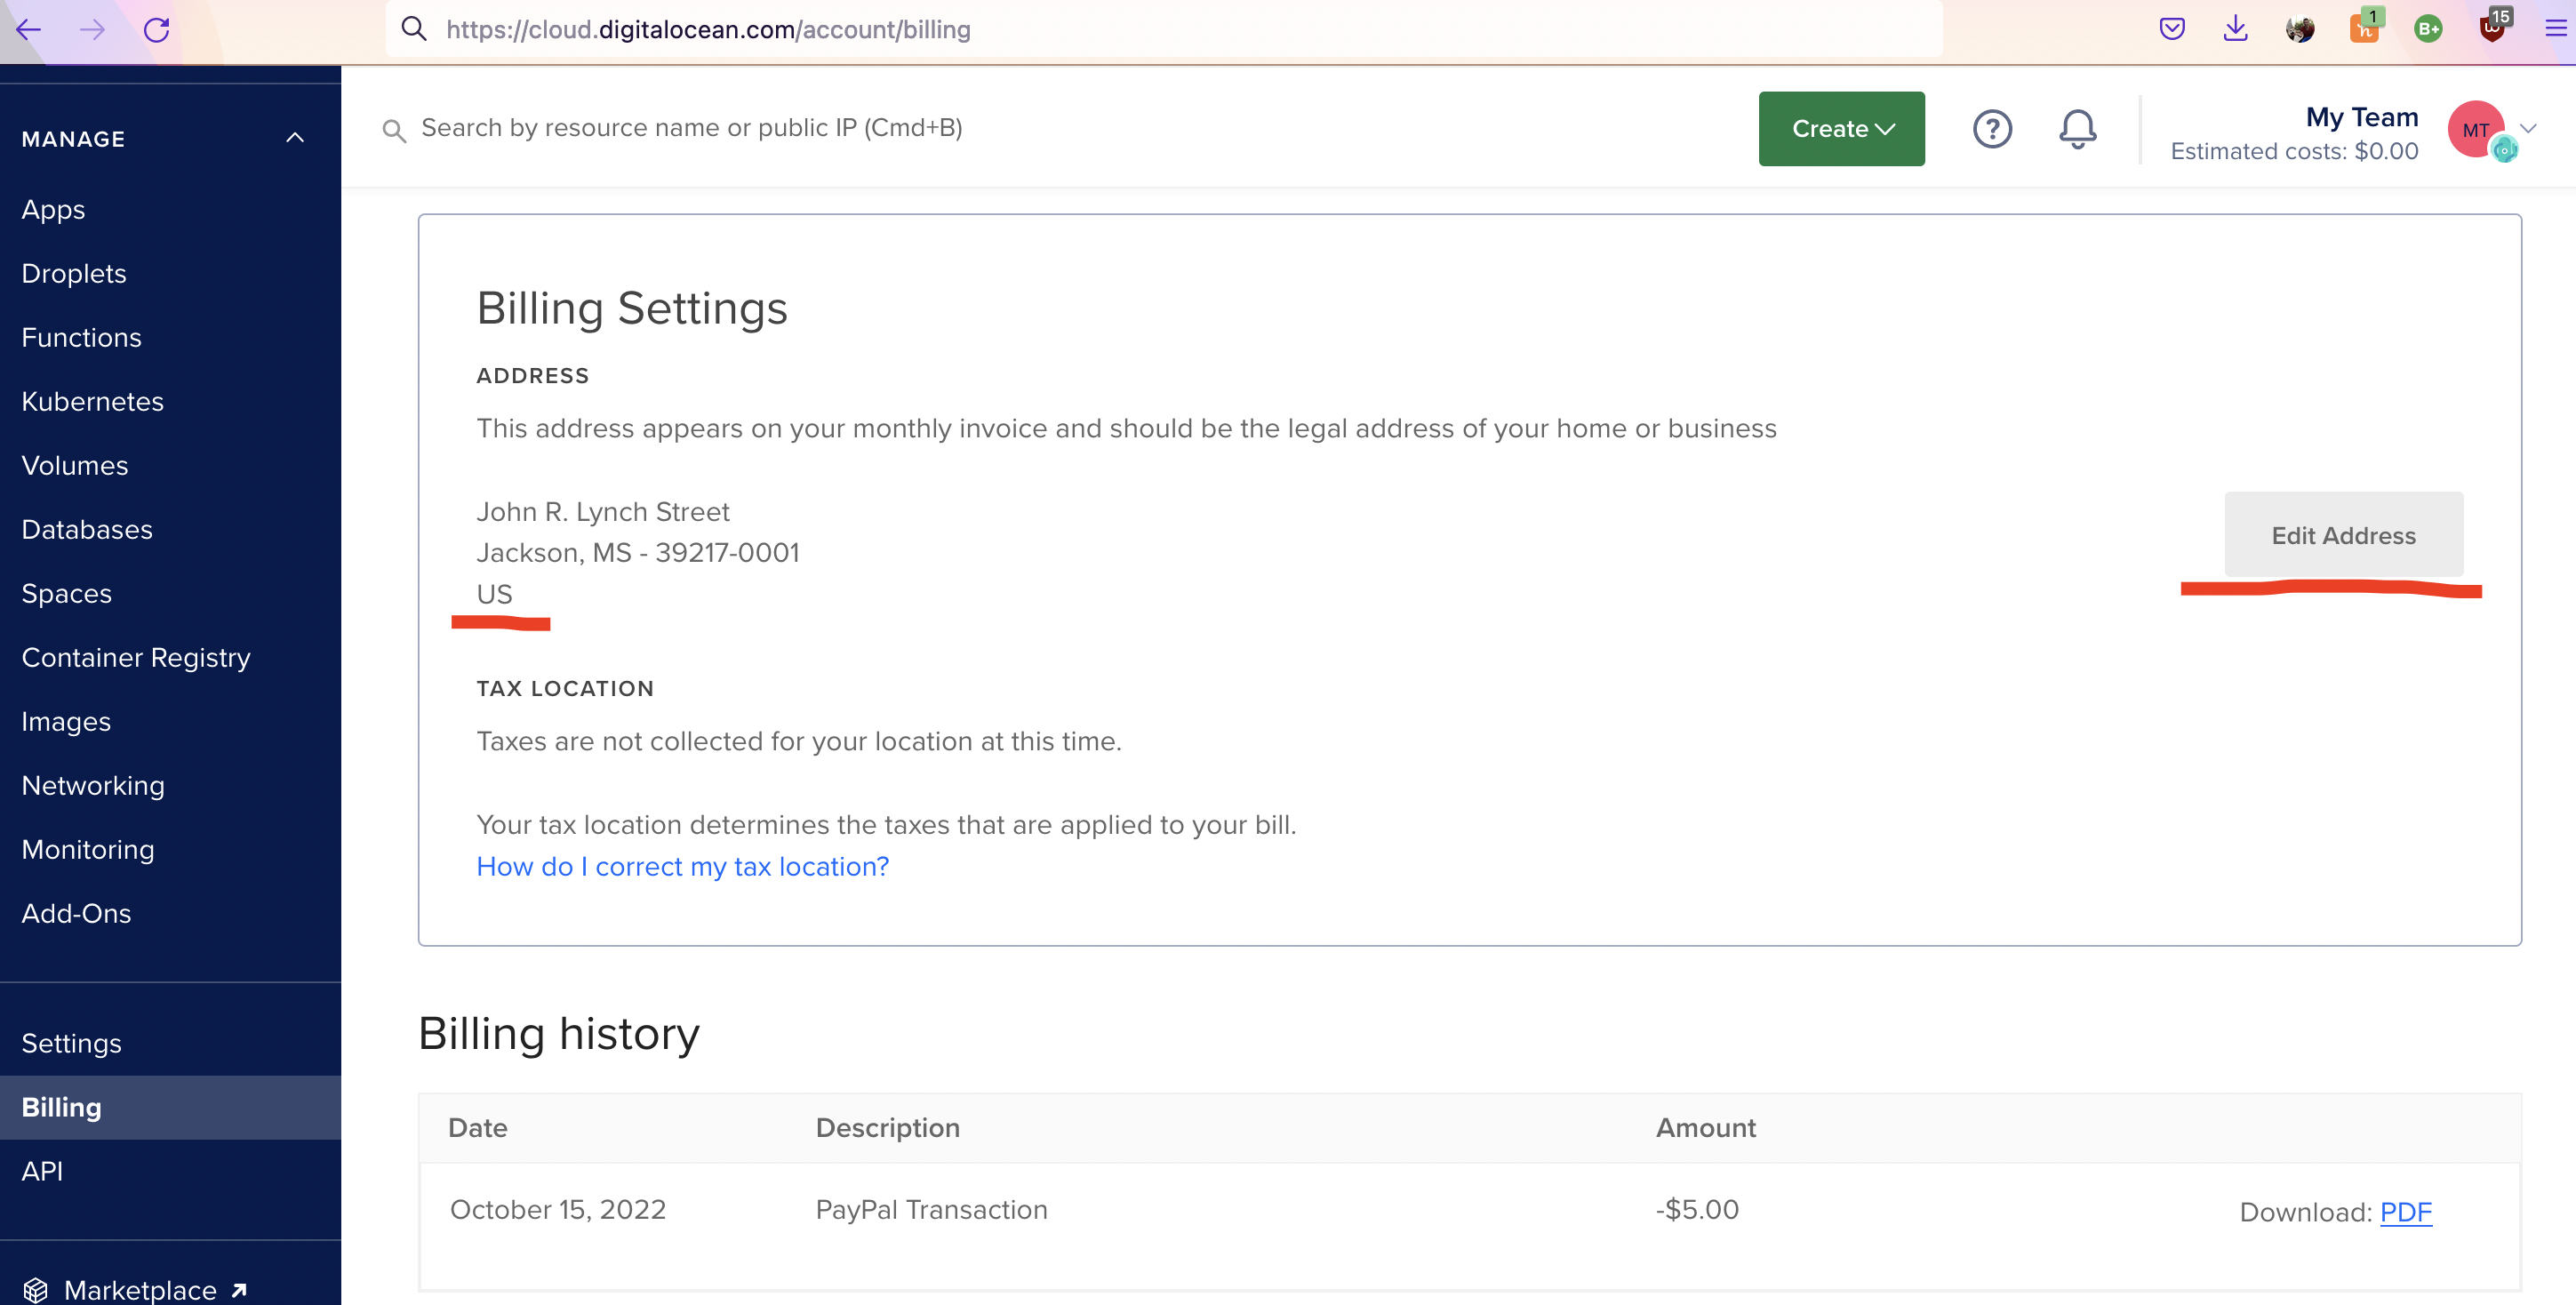
After that, (if appliable to you) set the billing address to the USA. That way you will not pay ±20% VAT.
An example address:
1601 Millersville Rd, Millersville, MD 21108, United States
Additionally, a coupon code that was valid on 15-Oct-2022 was DO10. Feel free to try it too.
Prerequisites #
Before deploying, ensure that your app can run on linux. Otherwise you will get errors:
bundle lock --add-platform x86_64-linux --add-platform ruby
This command will add a line in your Gemfile.lock. Now commit these changes to git, and let’s start!
Deploy to App Platform #
DigitalOcean App Platform allows you to deploy and manage apps easily, nearly like Heroku.
The cheapest paid tier would be $12/mo.
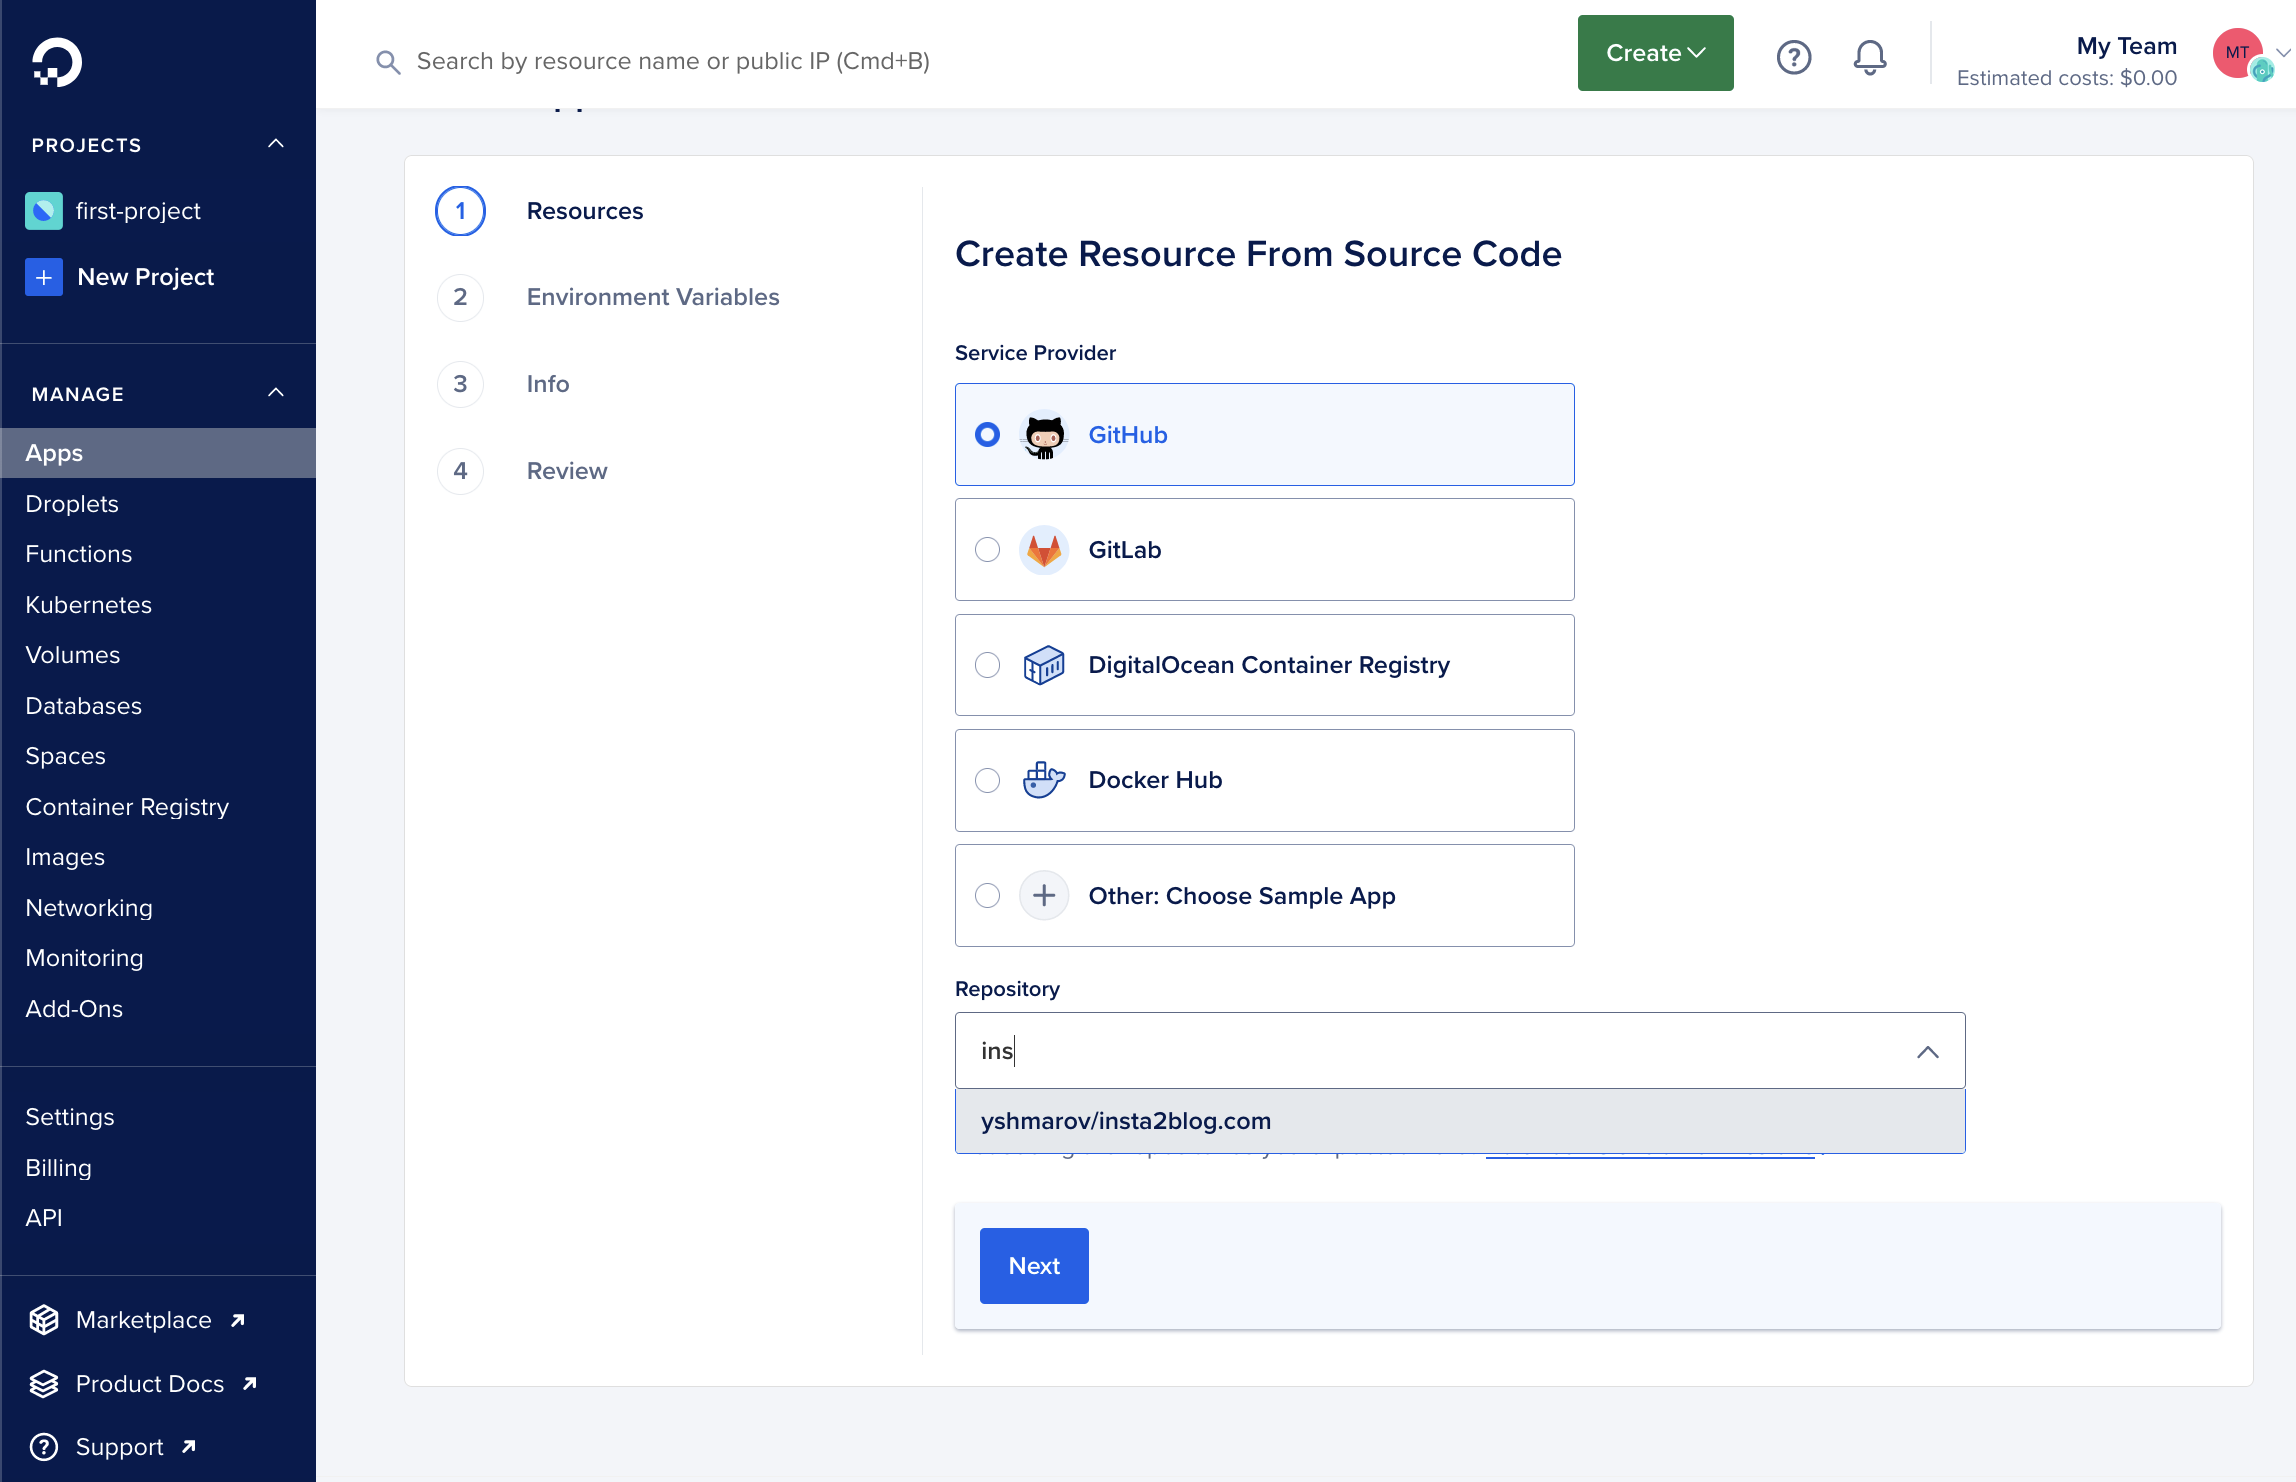
First, connect a Git repo:
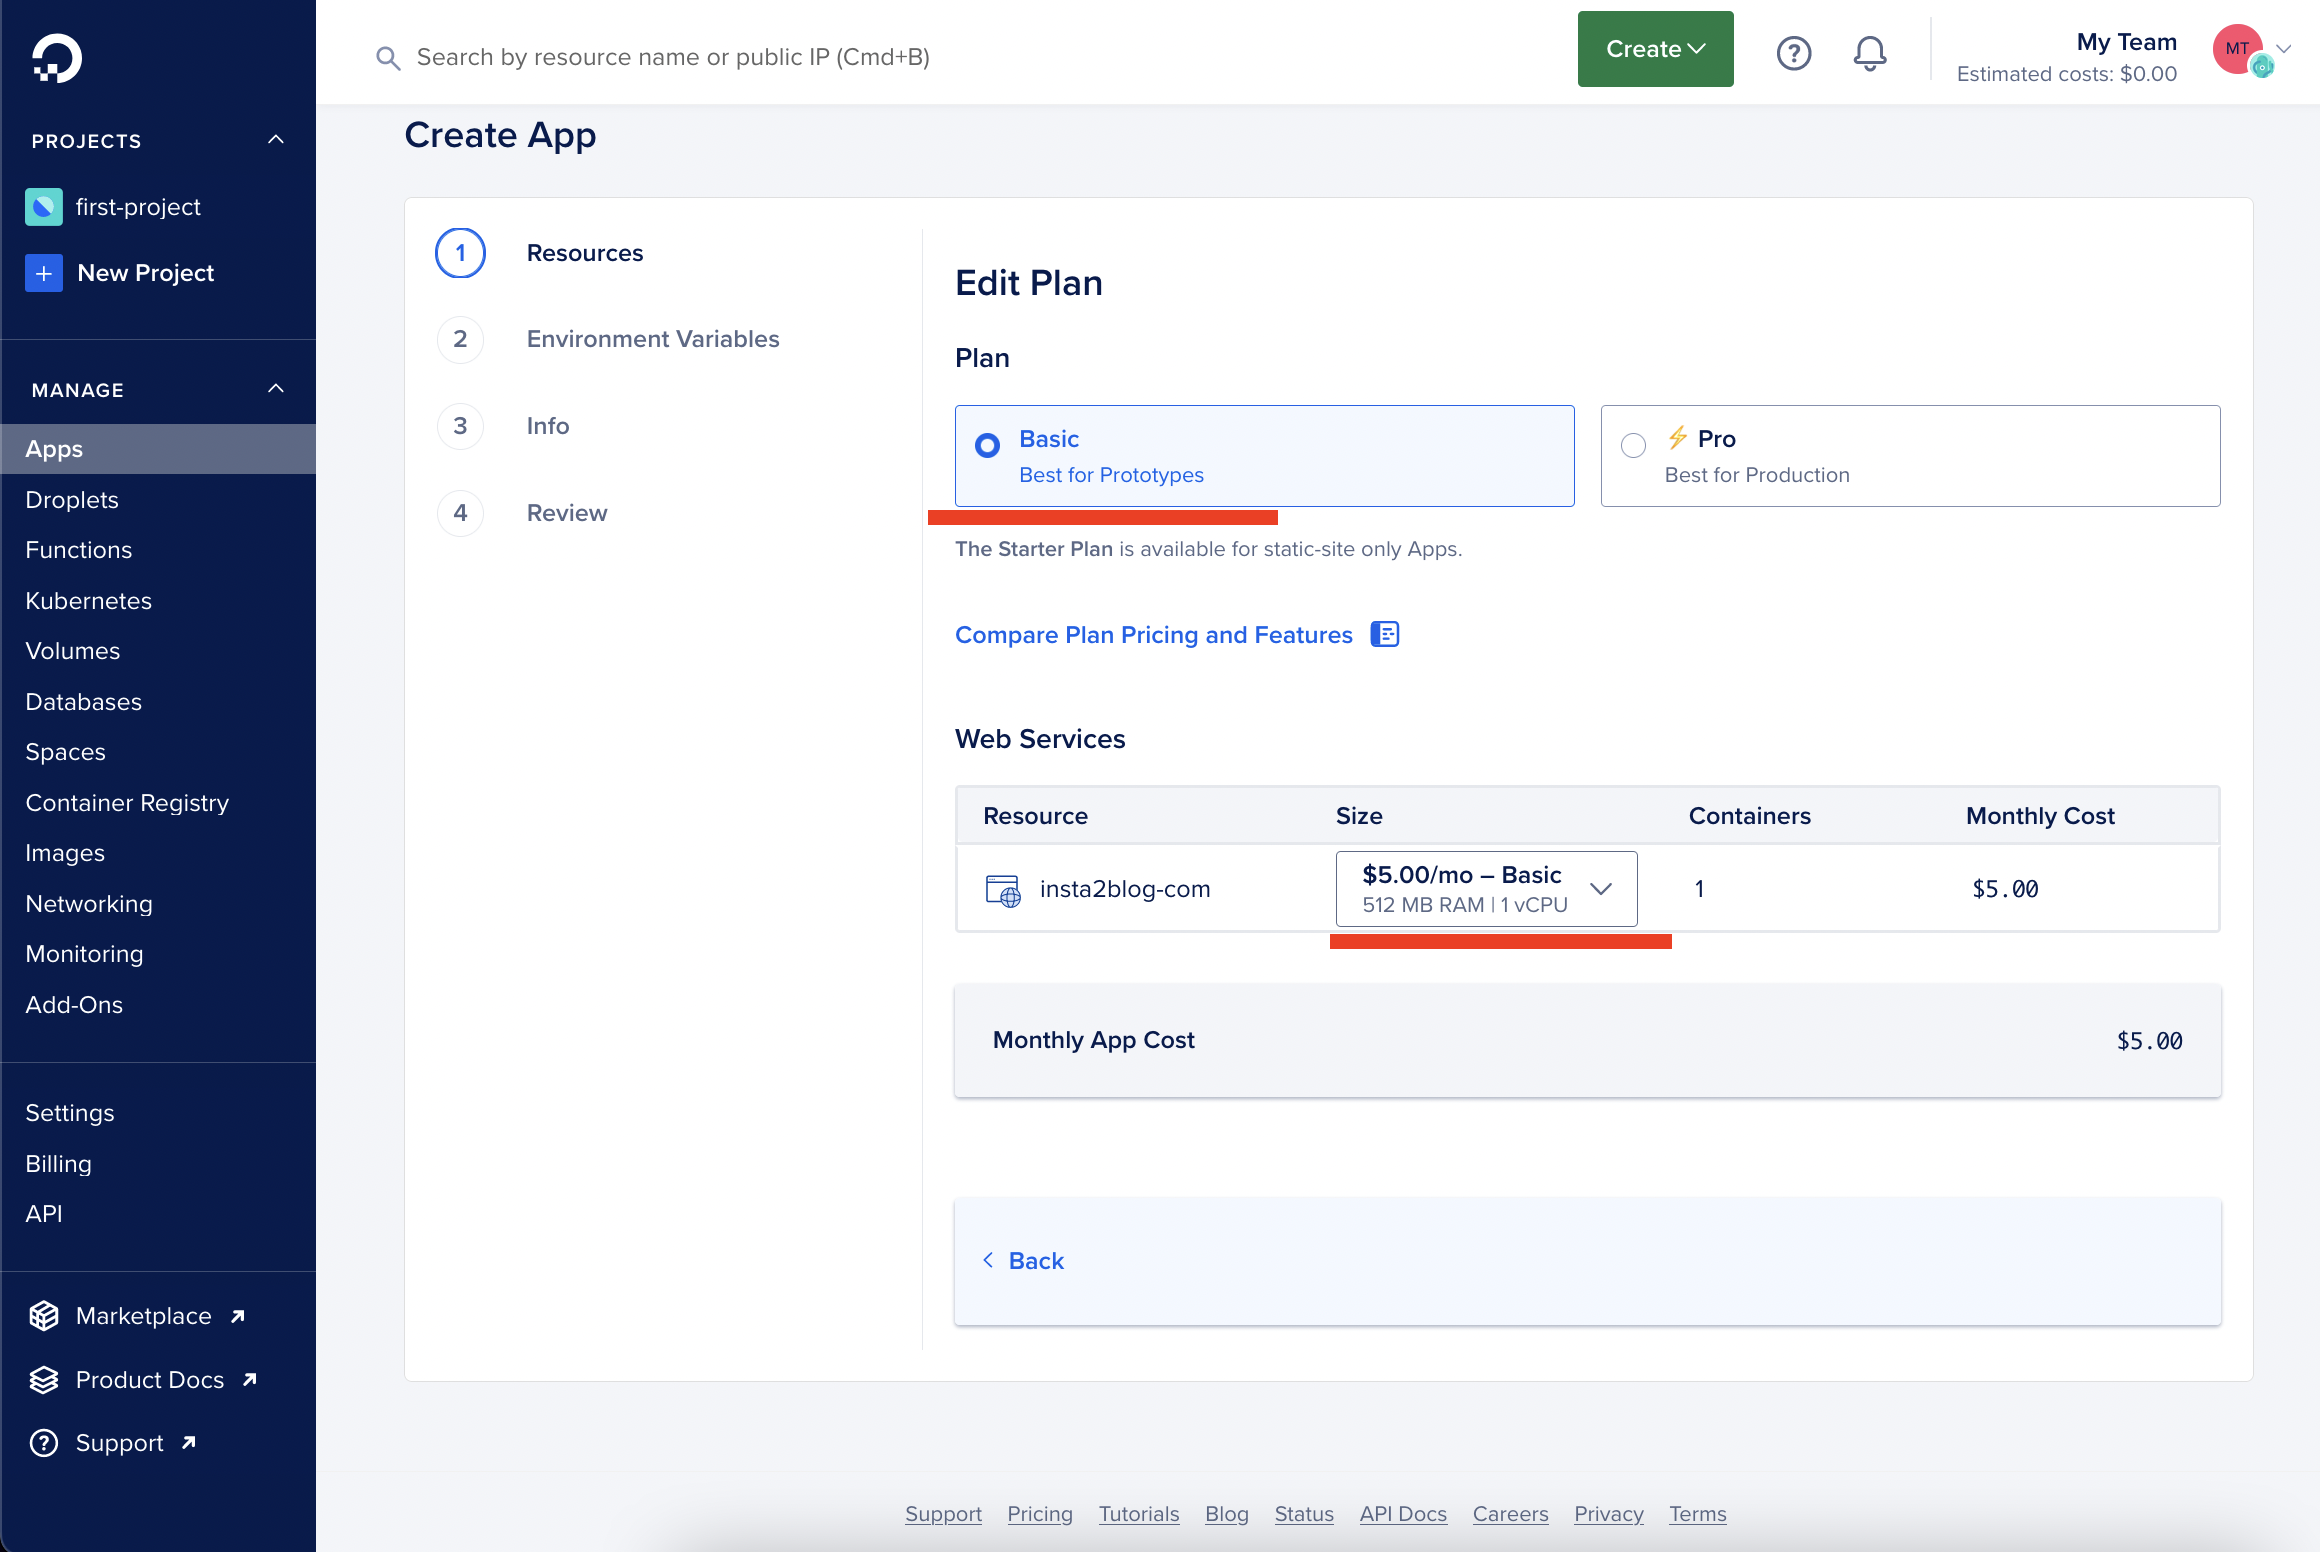
Click on Edit Plan and select the cheapest one for $5:
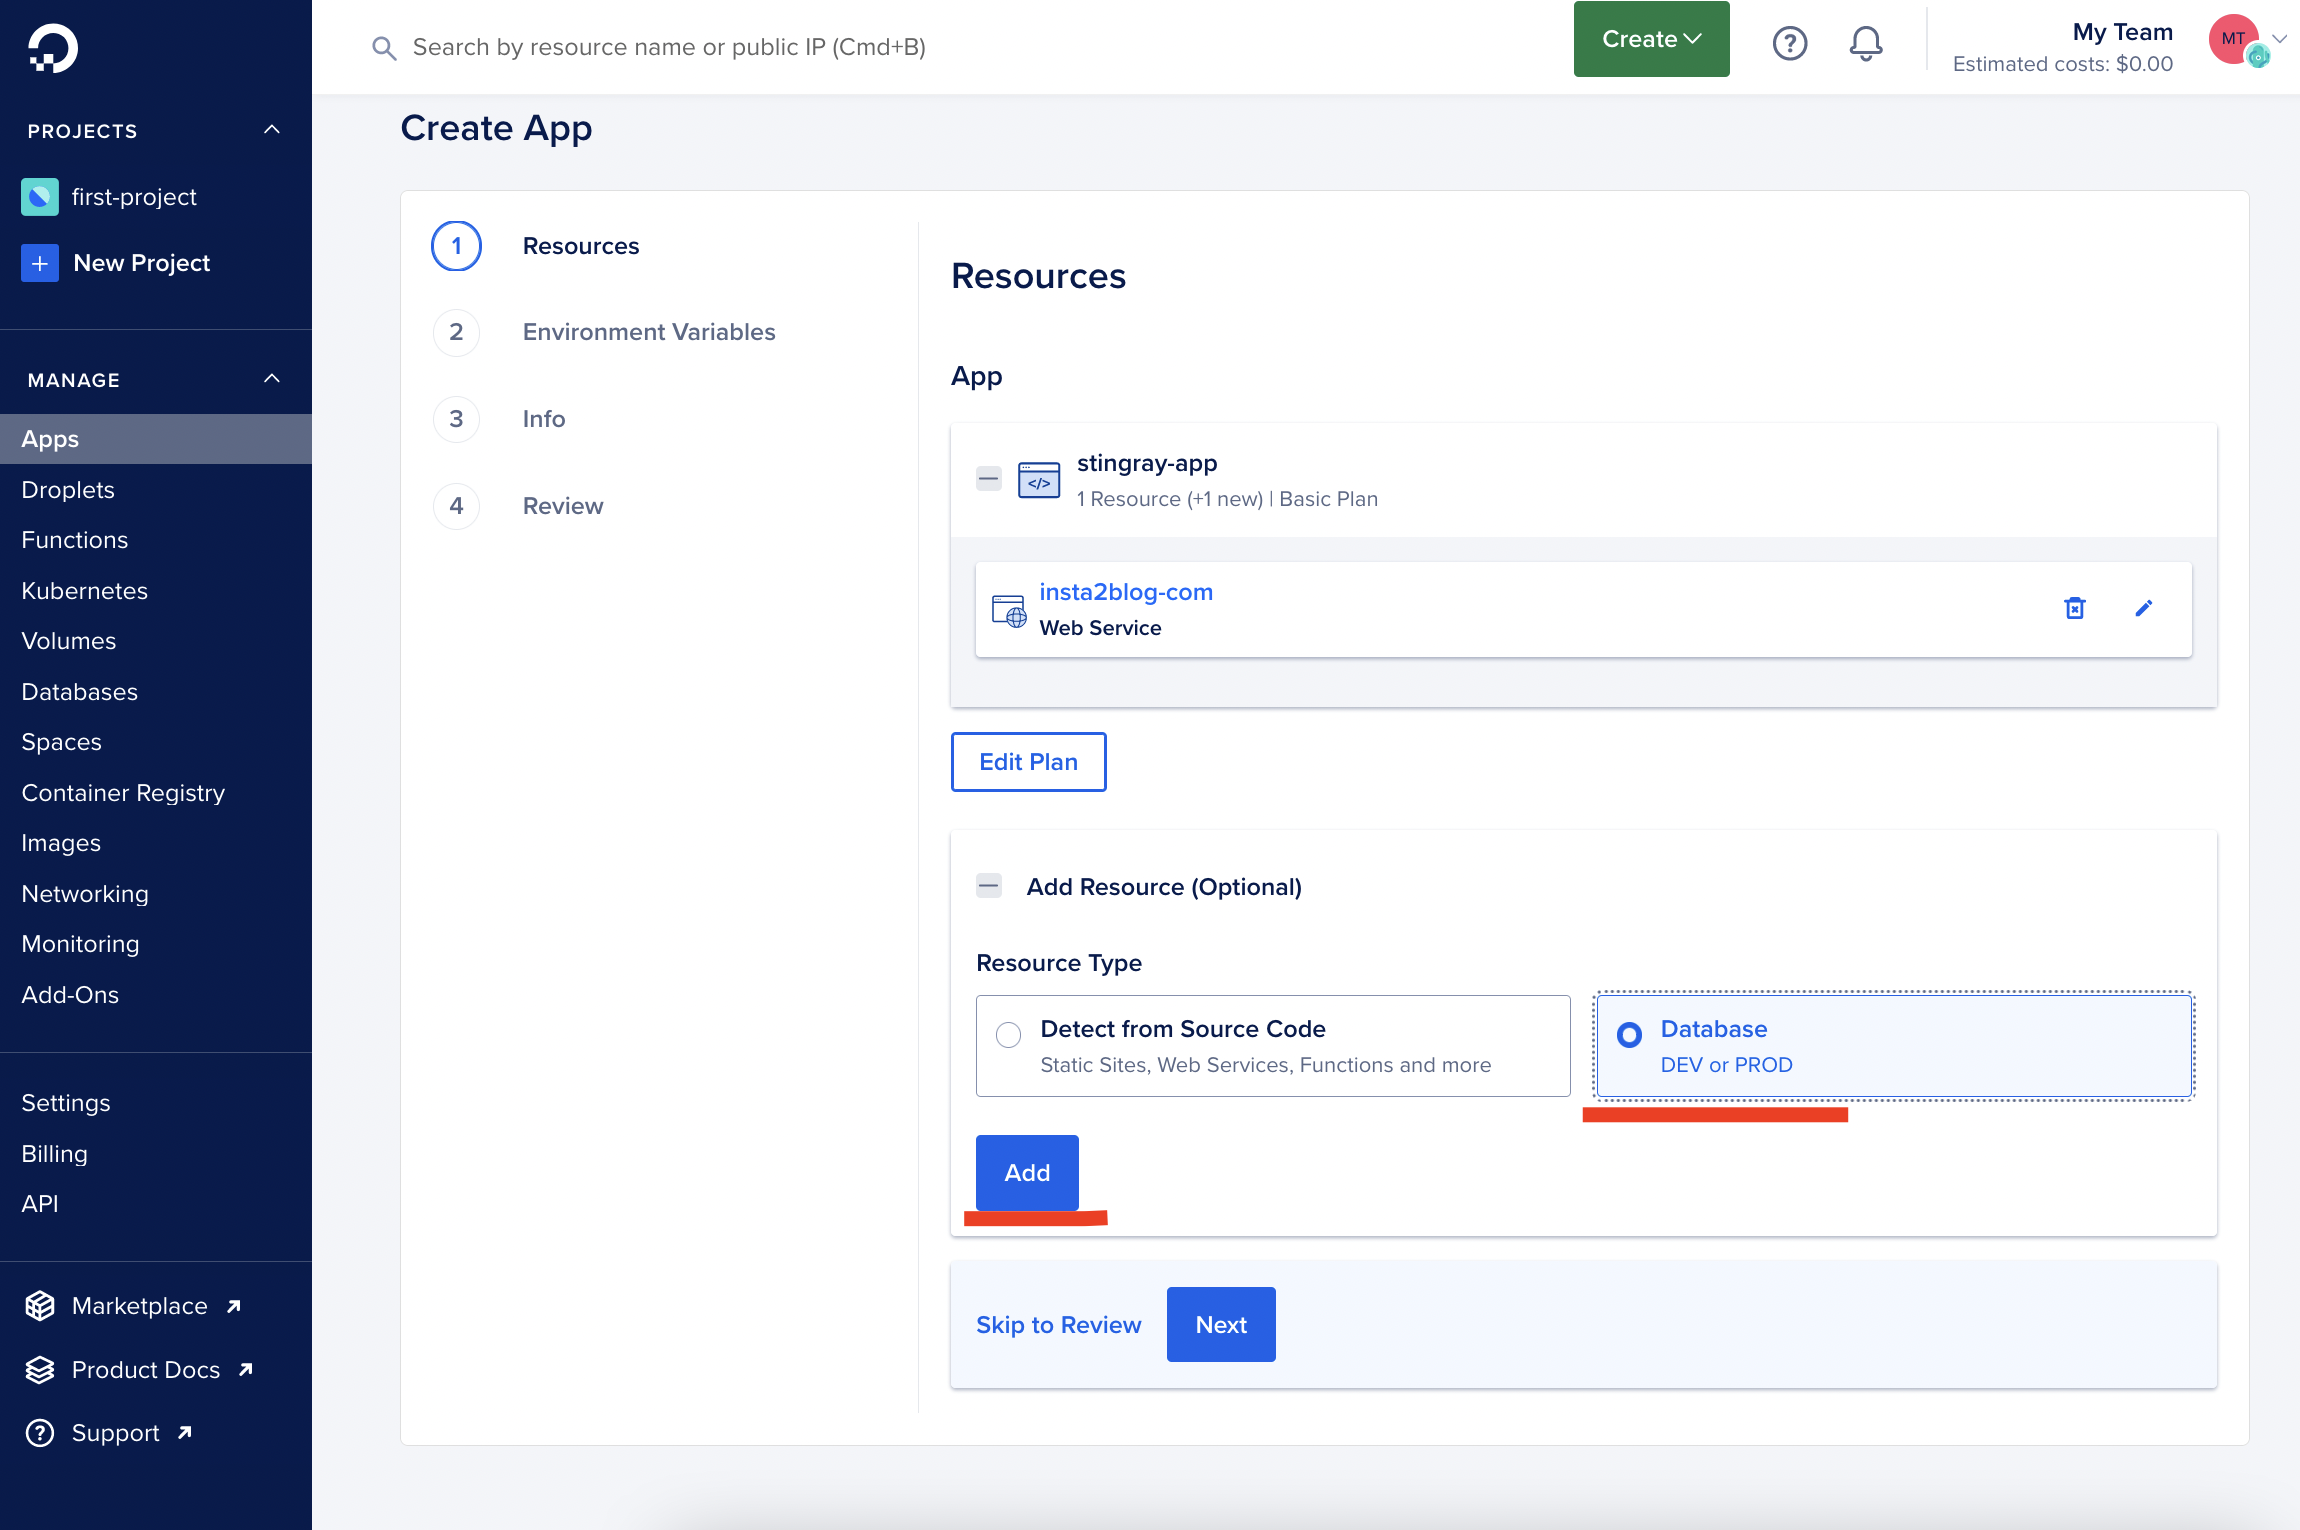
To add a $7/mo database, click on Database, Add:
Attach postgres cluster:
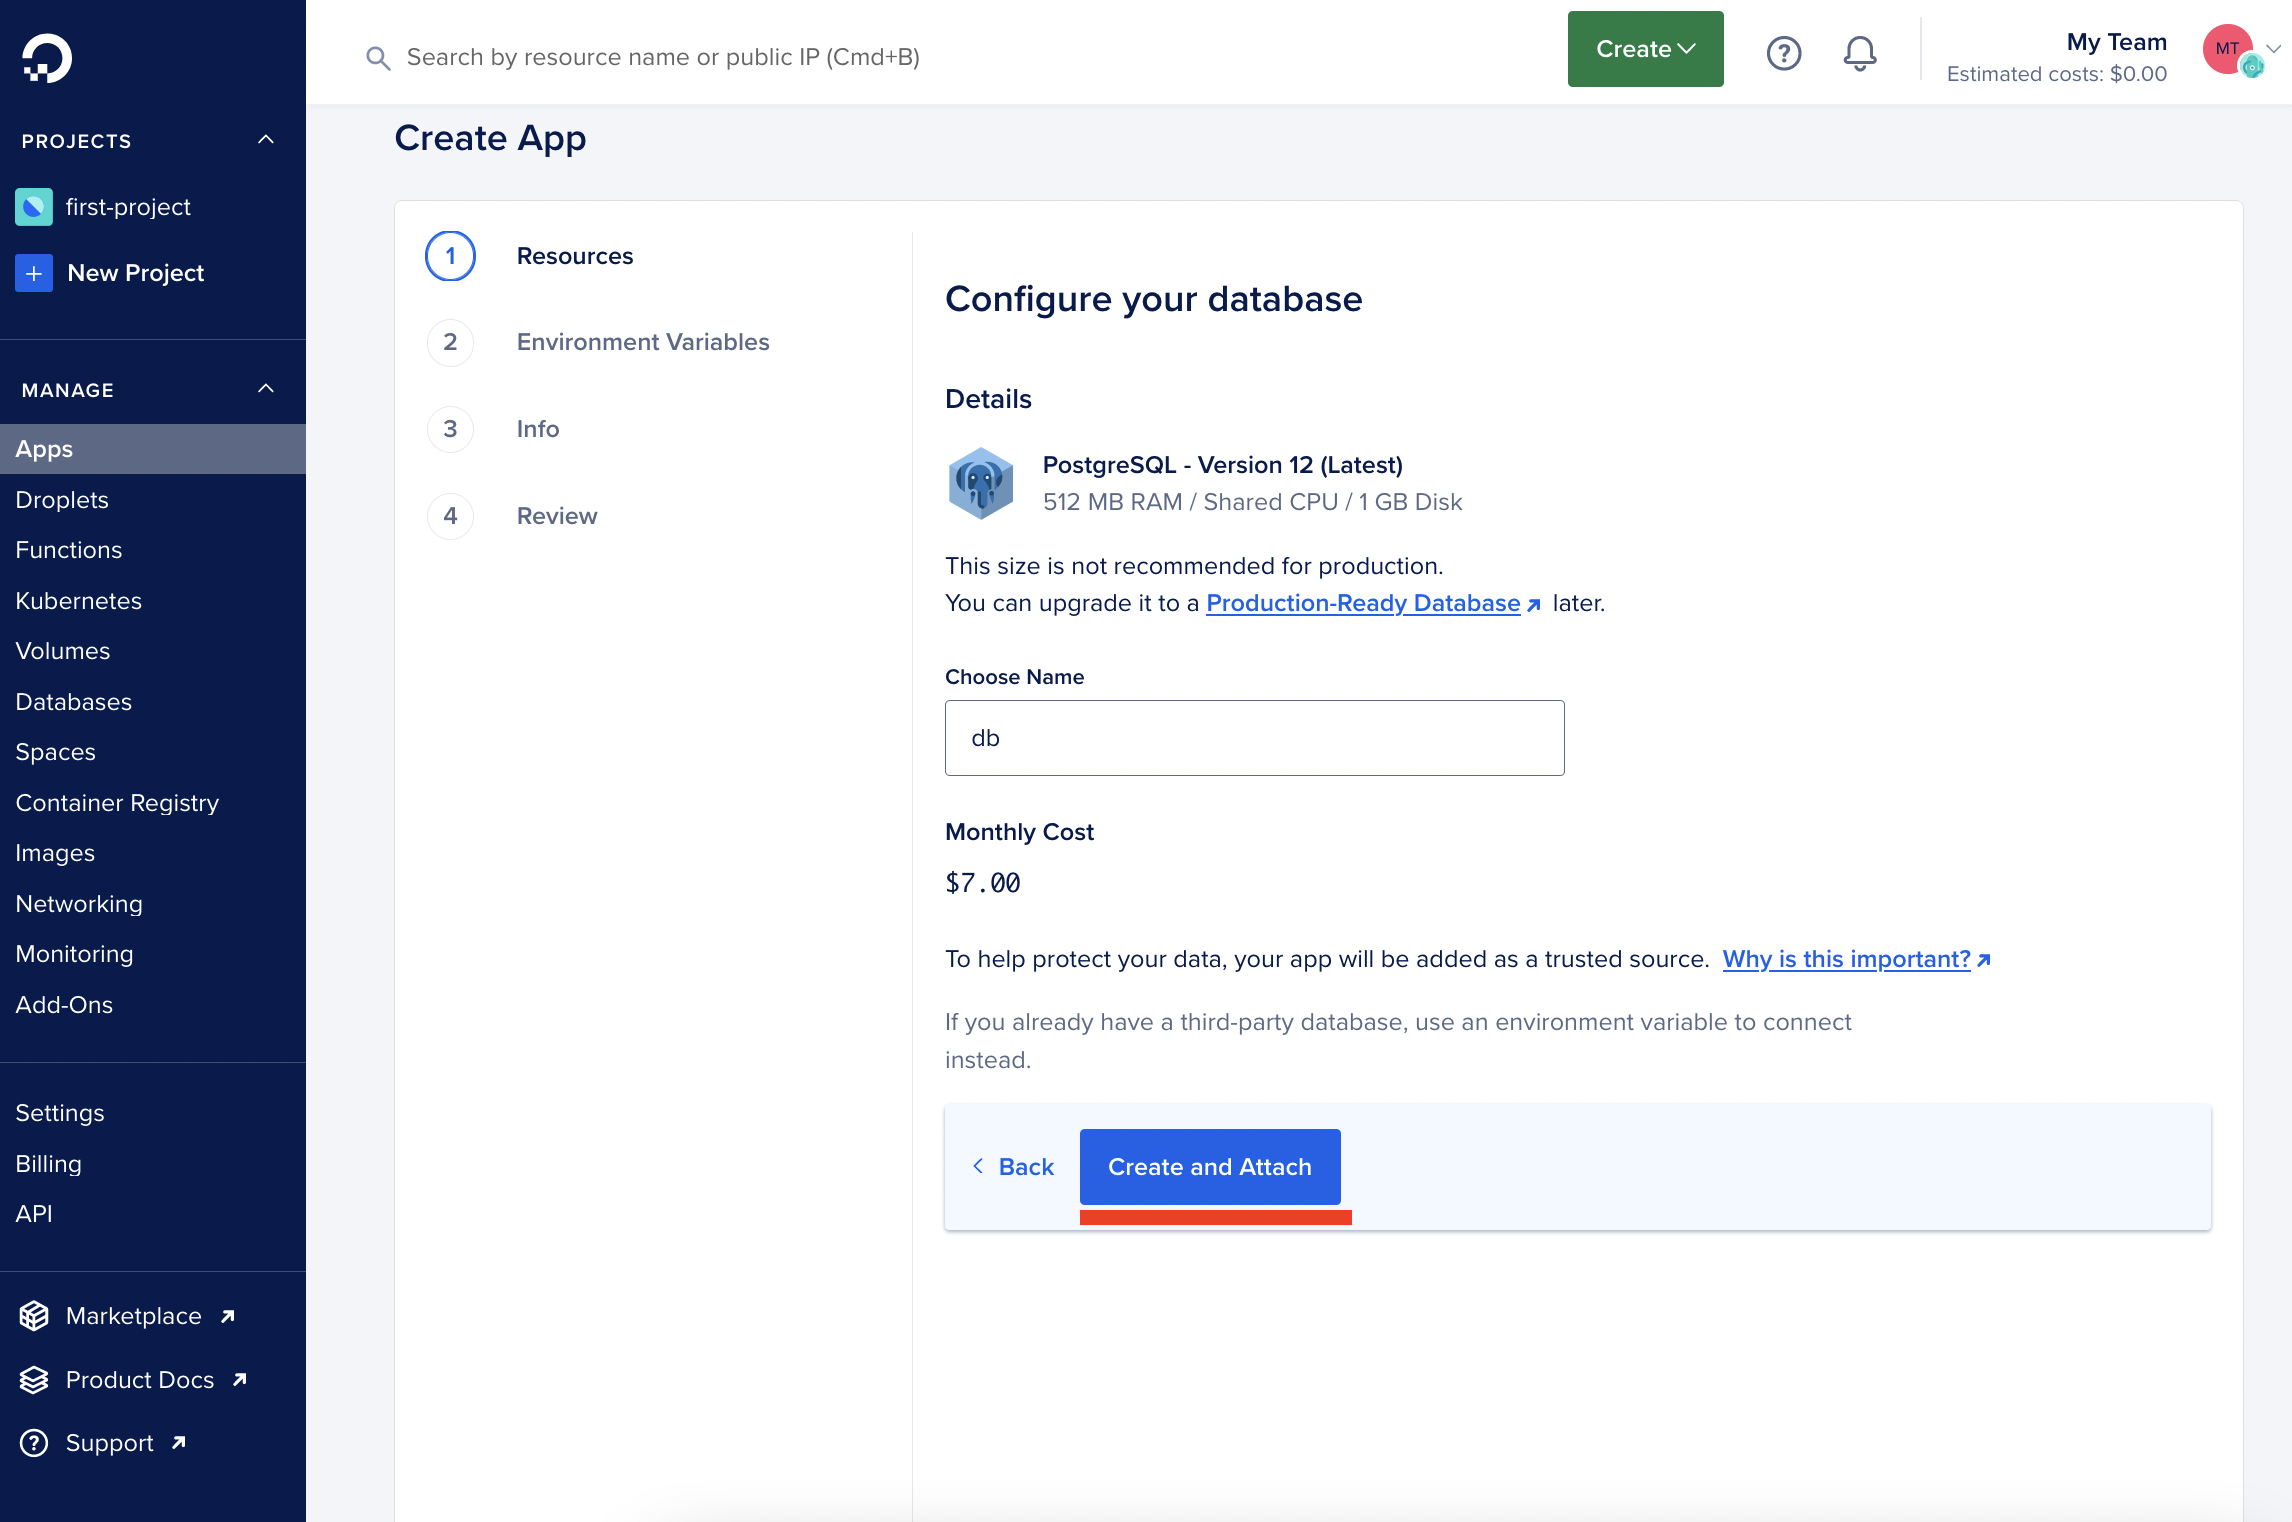
The $7/mo database can be upgraded later on to a $12/mo production-level database.
ENV variables #
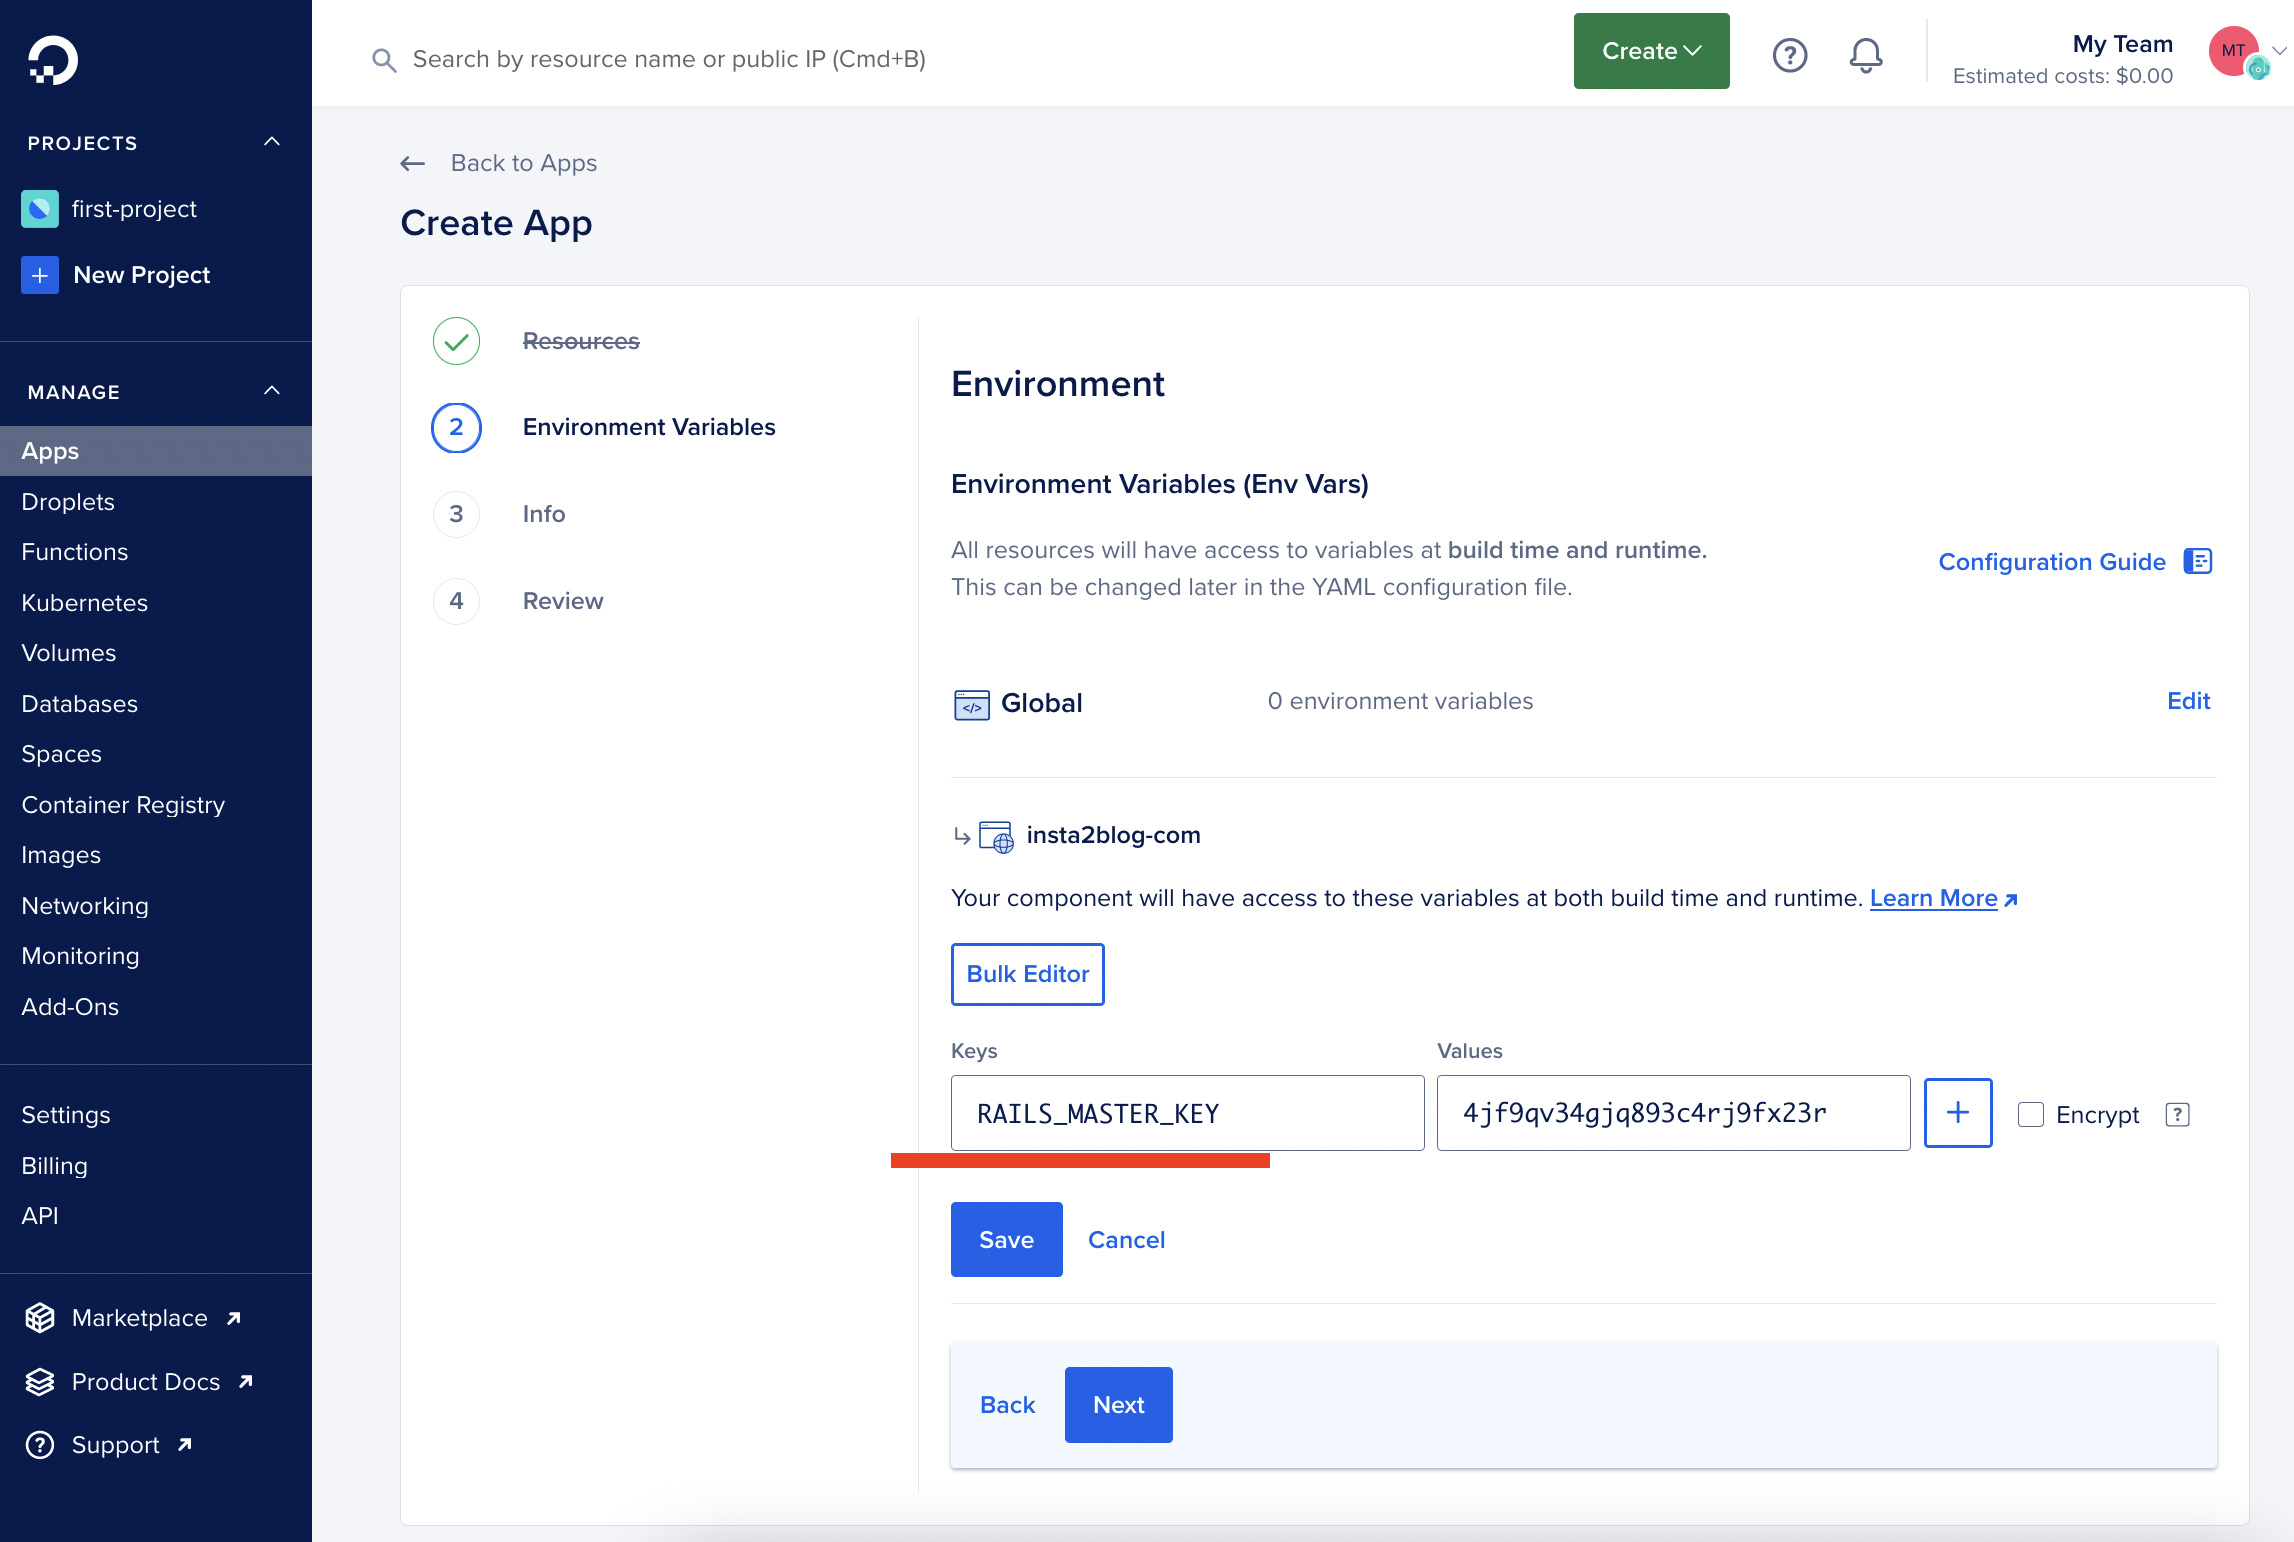
Add master.key as RAILS_MASTER_KEY, so that the production application can decrypt your credentials.yml file.
Previously, When you deployed an app to heroku, it would “automagically” add other config vars:
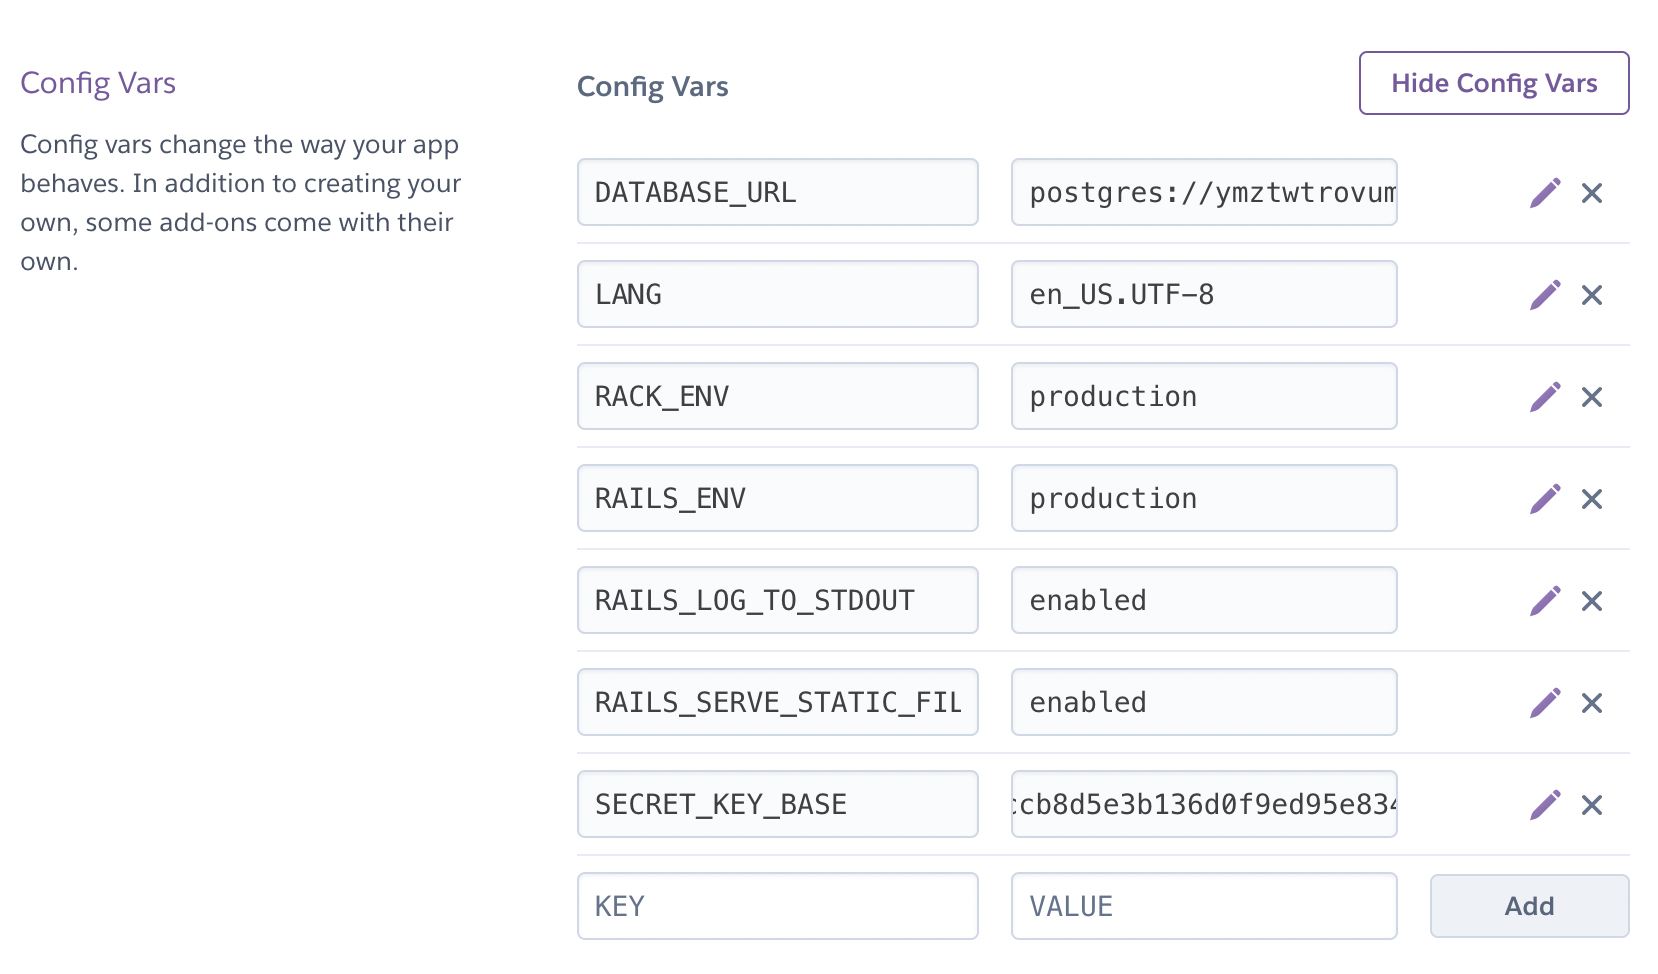
Here are the variables that I usually add to run the app:
# rails app vars
RAILS_ENV=production
RACK_ENV=production
RAILS_LOG_TO_STDOUT=enabled
RAILS_SERVE_STATIC_FILES=enabled
RAILS_MASTER_KEY=d23a37793ce1d23a37793ce1

DATABASE_URL=postgresql://doadmin:wergerge@abc-db-prod-do-user-324243-0.b.db.ondigitalocean.com:25060/defaultdb?sslmode=require
# DATABASE_URL = ${db-postgresql-ams3-147.DATABASE_URL}
# DATABASE_URL = ${db.DATABASE_URL}
Important: add these variables on the rails app-level, not on the DigitalOcean container-level.
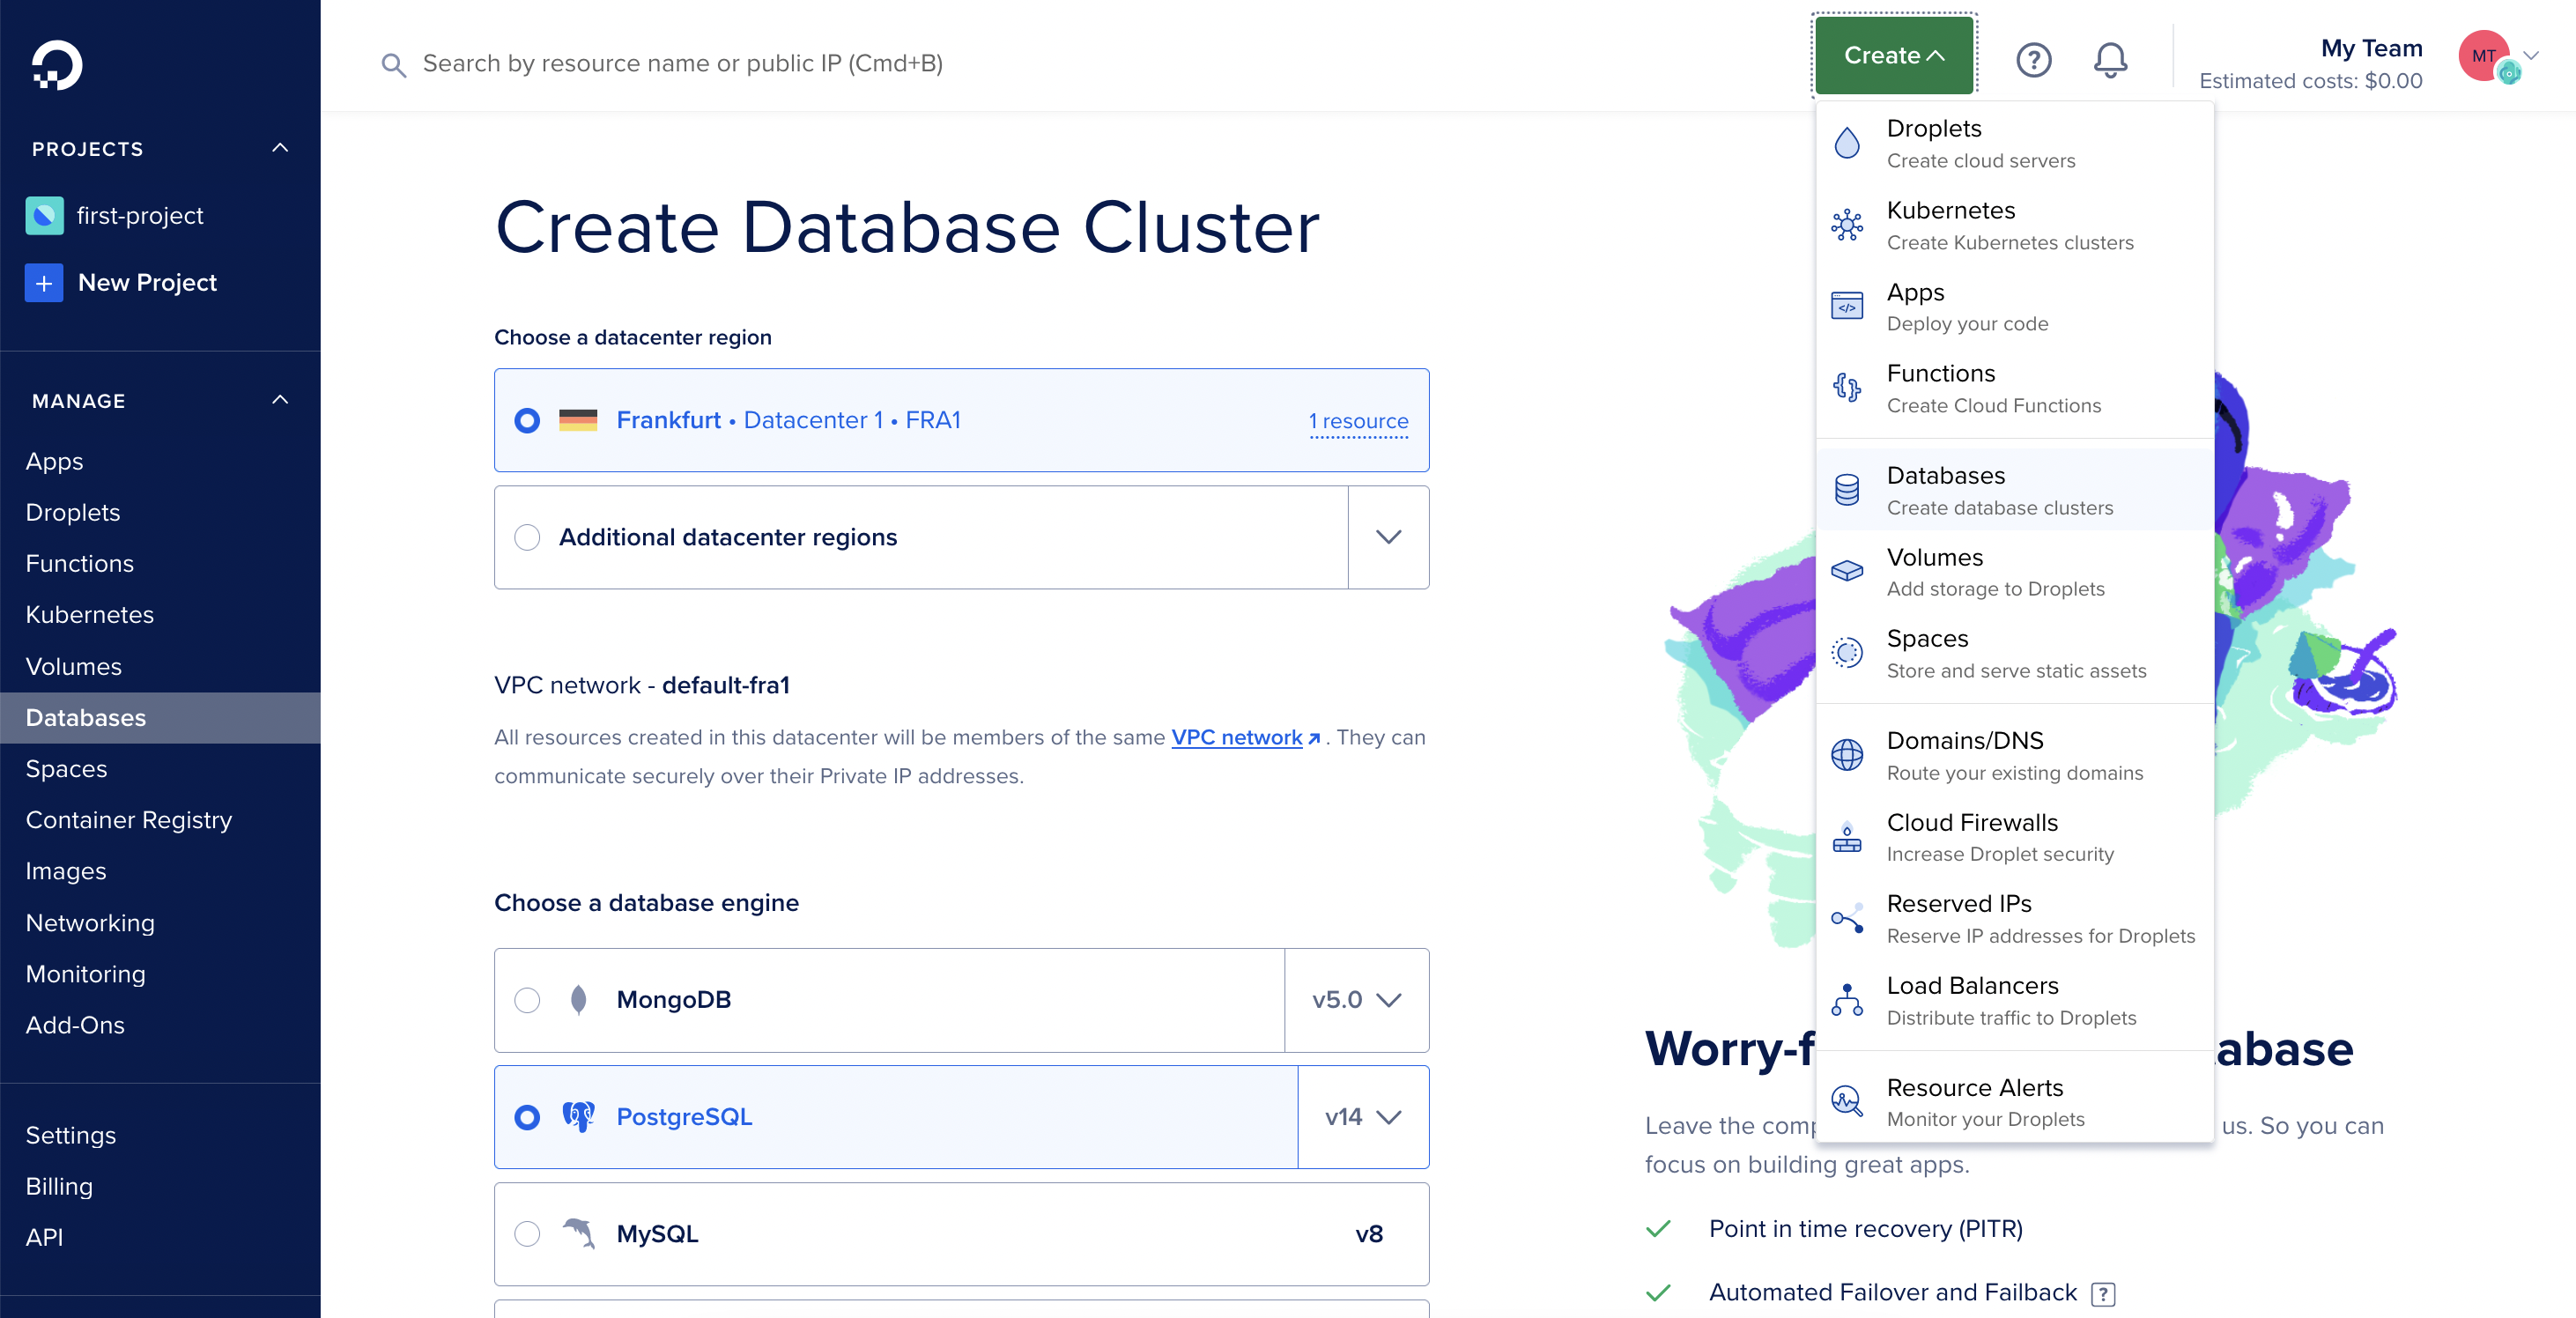
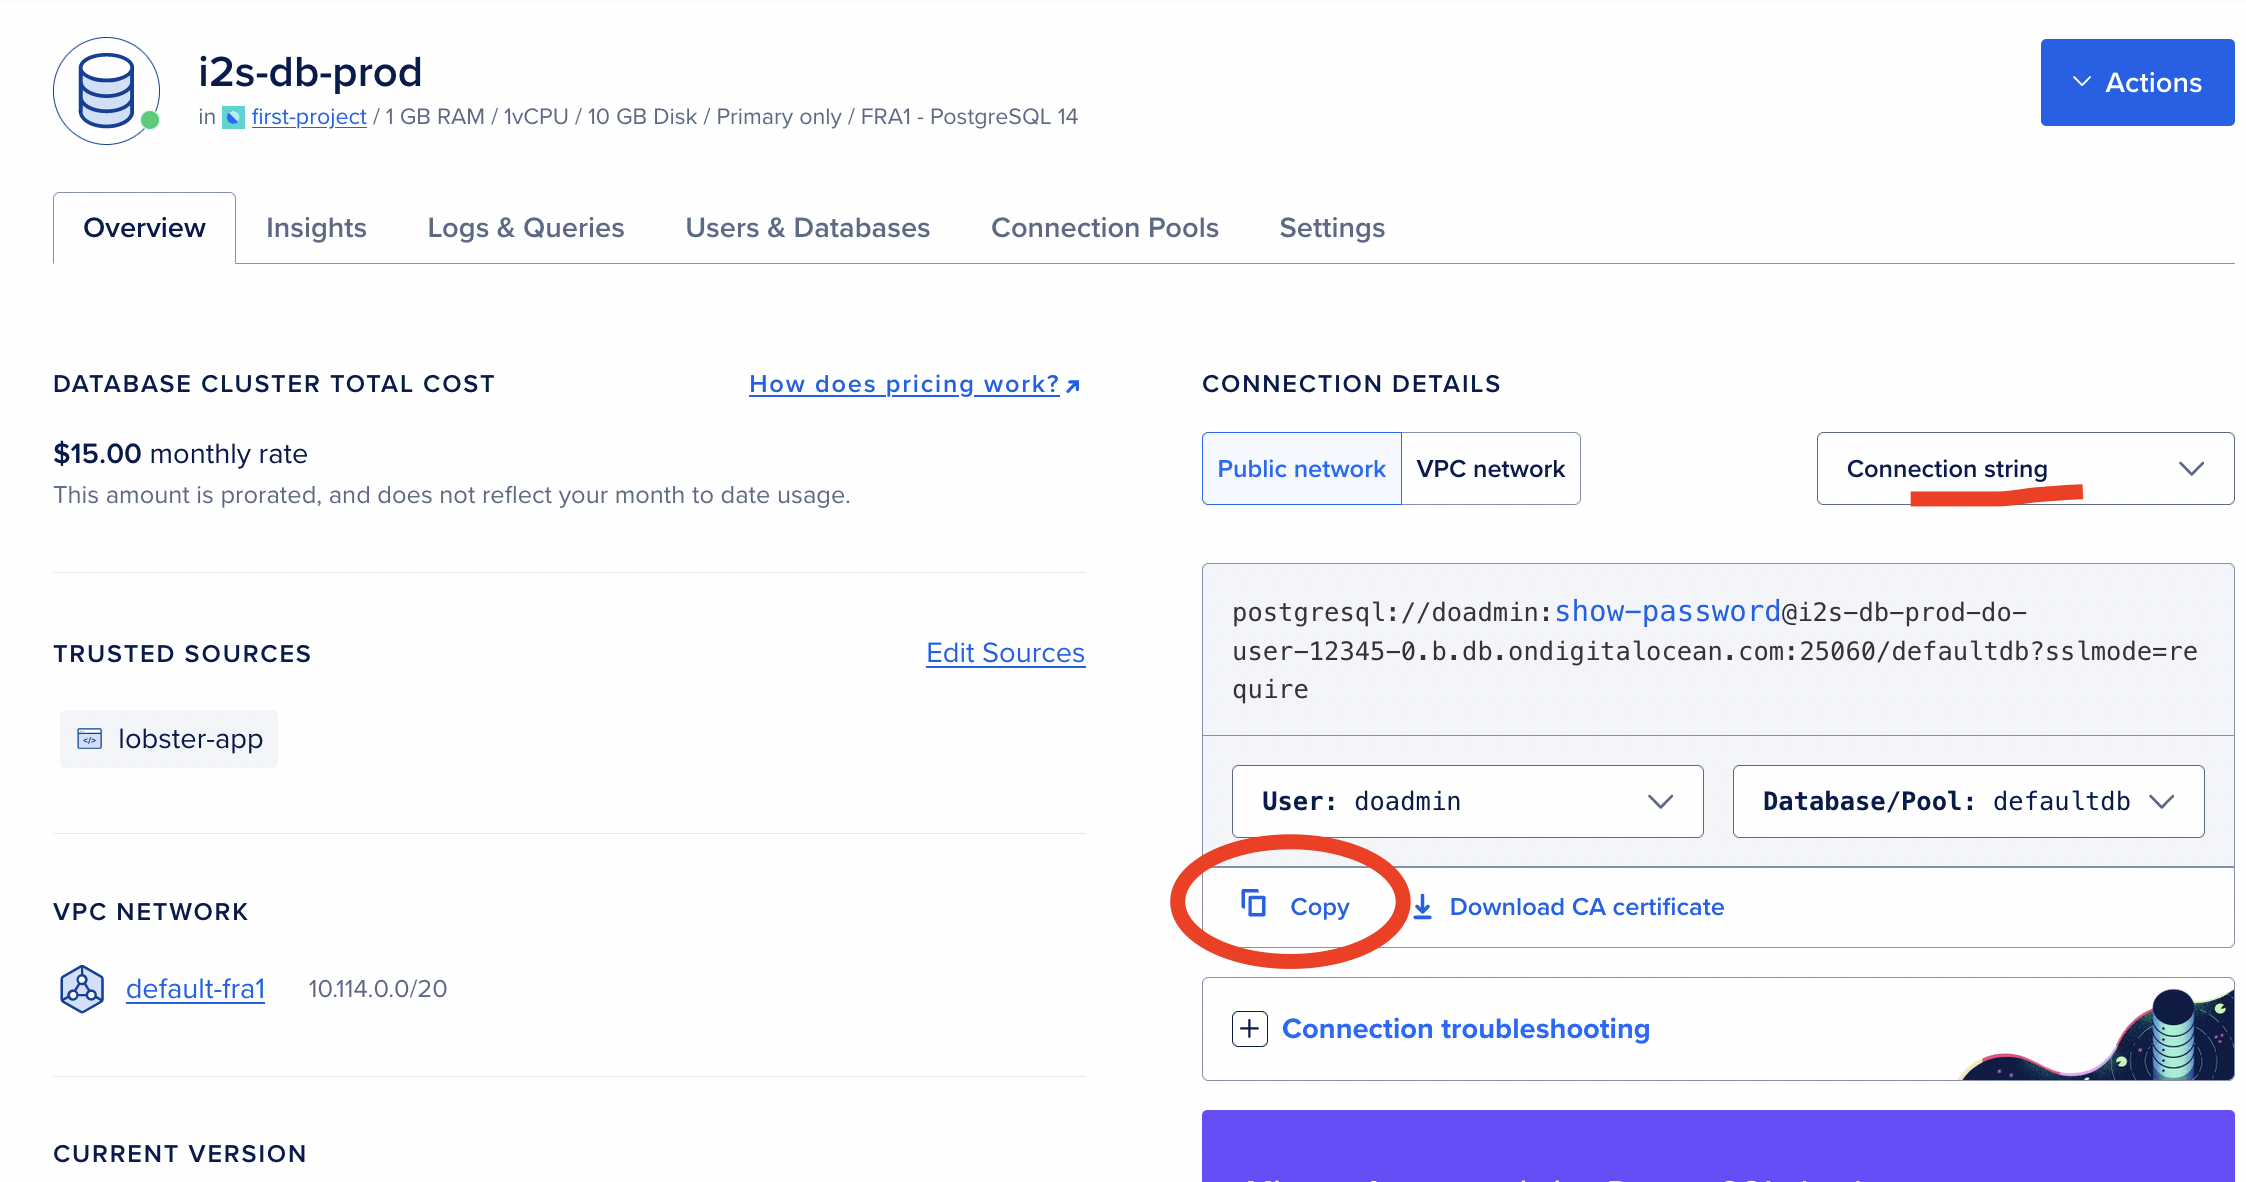
Create a managed Postgres database #
If you want to create a managed database (not the “sandbox” one for $7/mo), it will cost $15/month.
To get the DATABASE_URL, you will need to copy the connection string.
Redis database? #
🚨 You will need Redis, if you are using Rails 7 Hotwire Broadcasting feature! 🚨
You will also need it if you are using Sidekiq and background jobs.
The same way you did with Postgres, you can create and reference a Redis database:
REDIS_URL=rediss://default:abcdef@db-redis-fra1-12345-do-user-123456-0.b.db.ondigitalocean.com:25069
# REDIS_URL=${redis-db.REDIS_URL}
Run Command #
After deplyoment, you can either manually run migrations, or add them to the Run Command:
# Run Command
bin/rails db:migrate
rails server -p $PORT -e ${RAILS_ENV:-production}
Log Forwarding #
Analyzing application logs is usually important in the development lifecycle. It let’s you find errors, long queries, popular queries… So that you can optimize.
IMHO the easiest (and free) way to store and track logs is Papertrail.
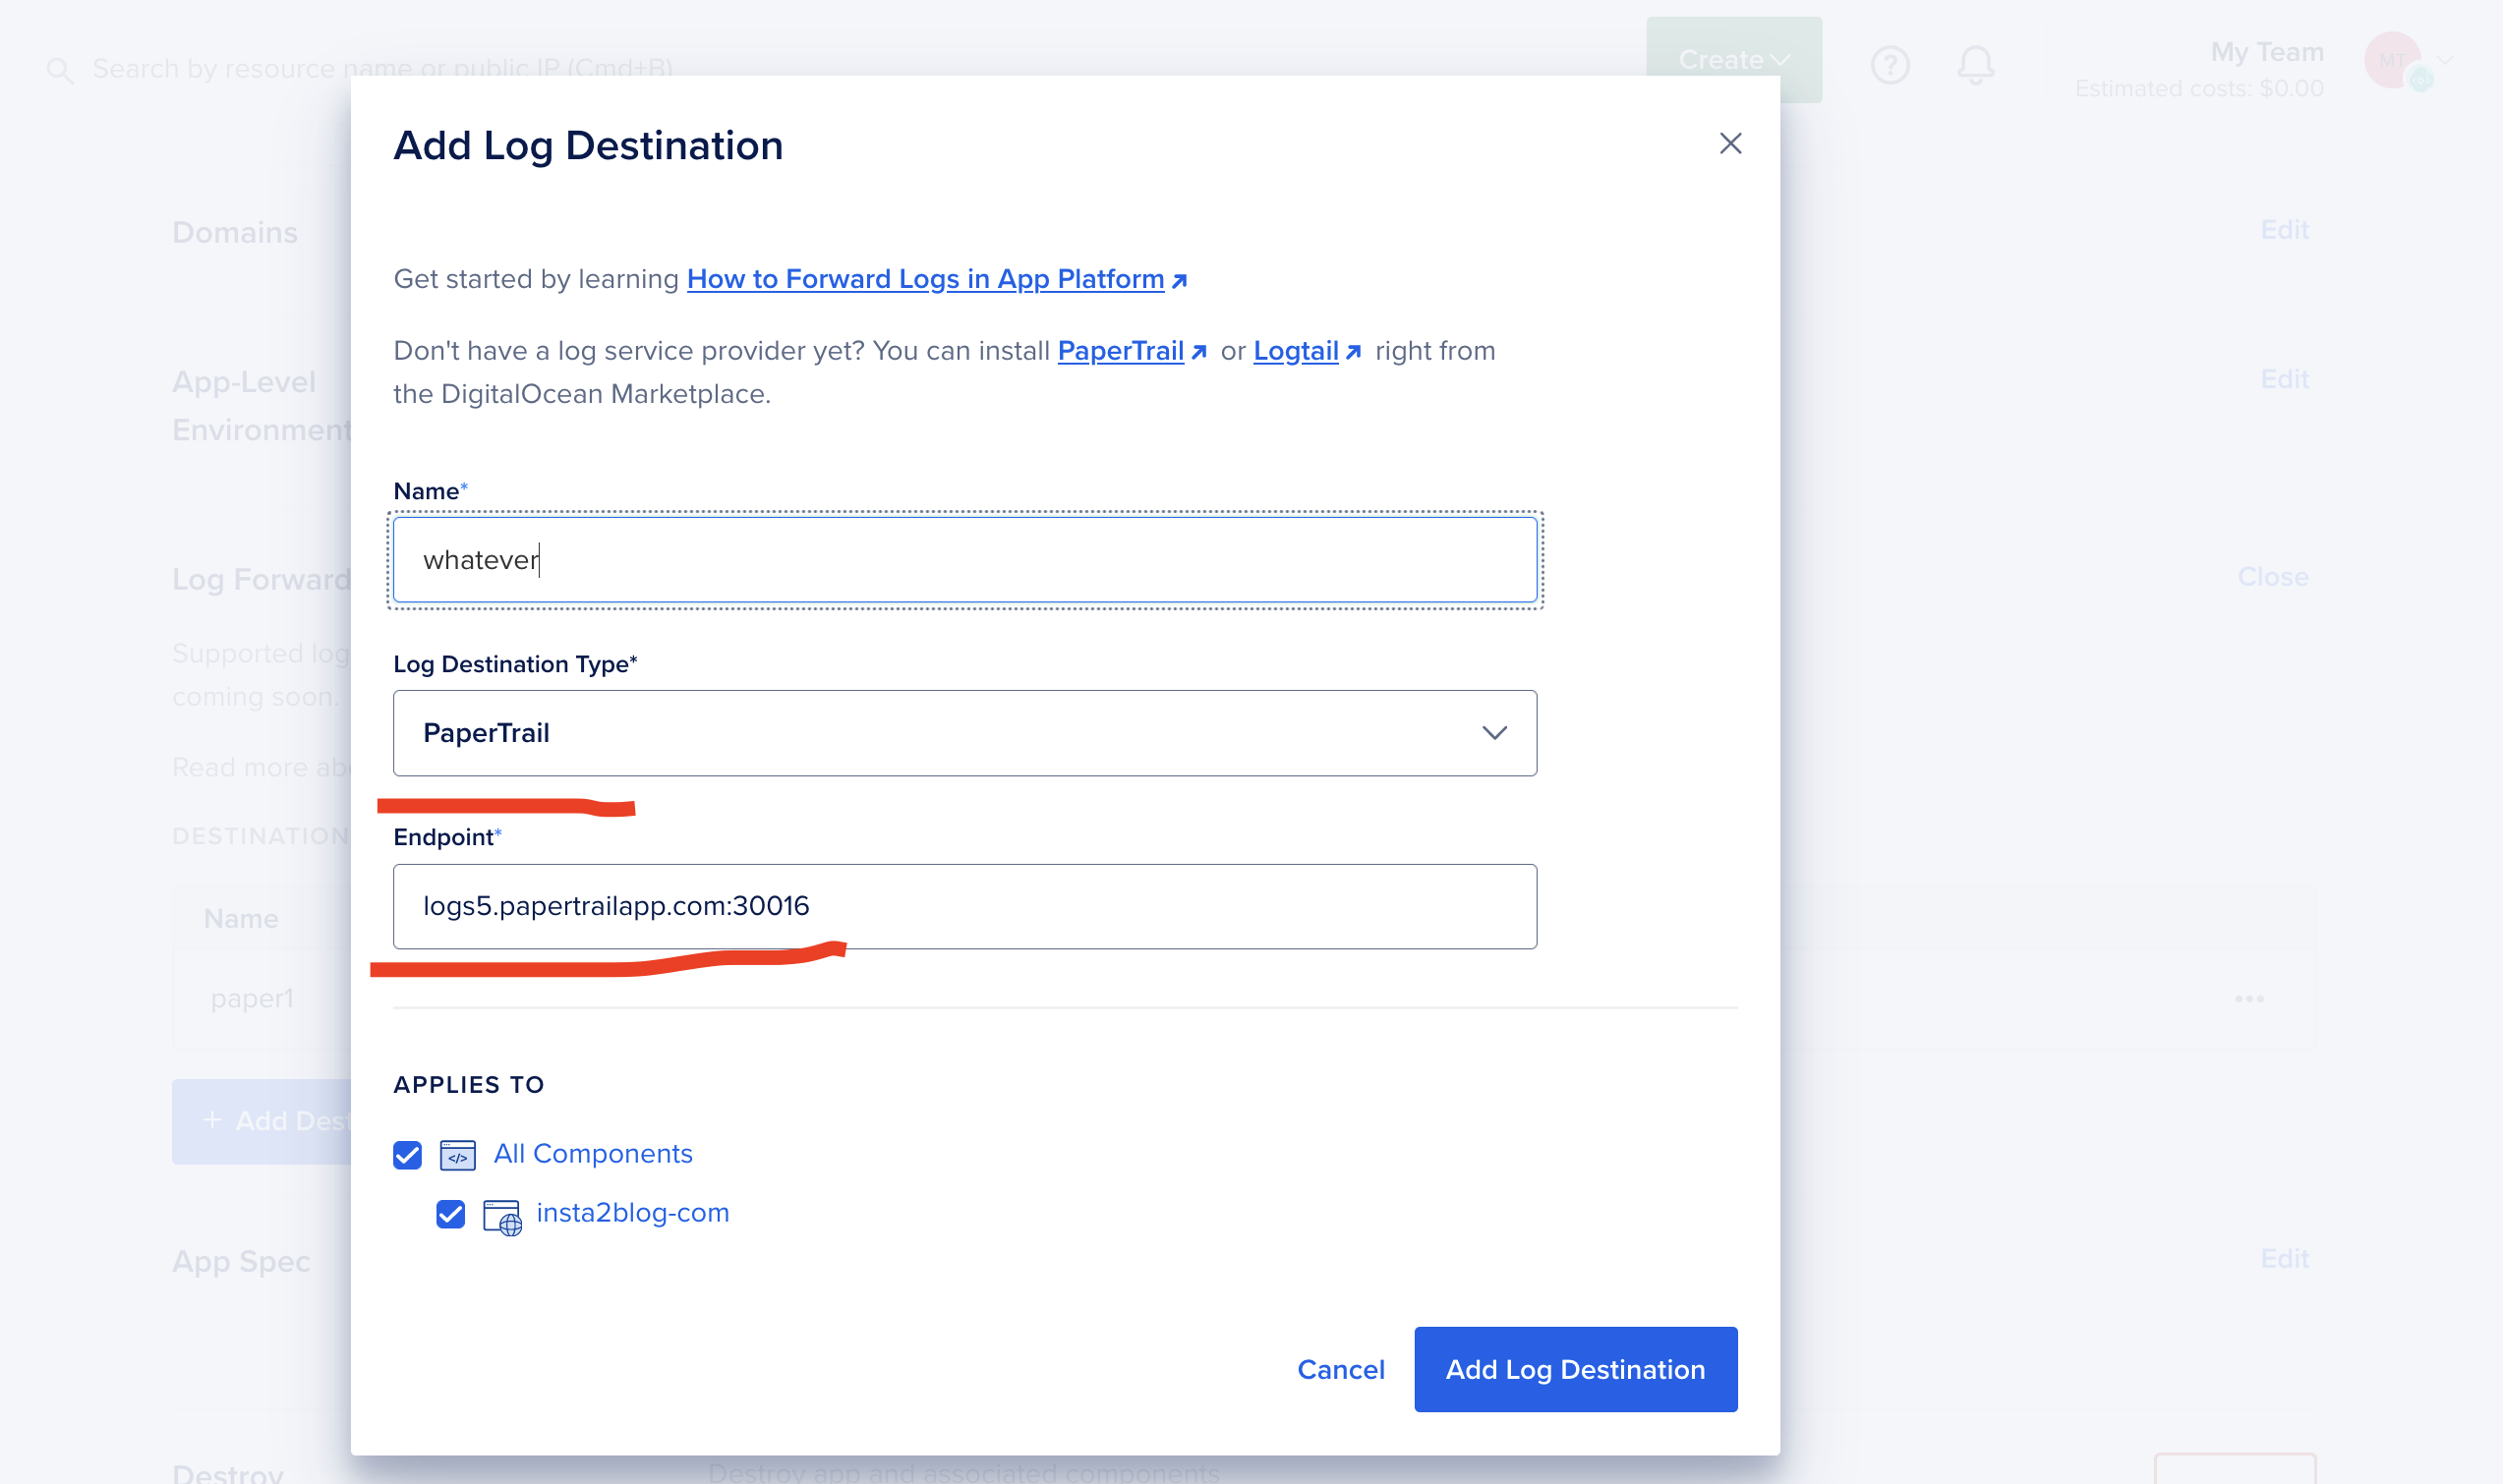
After you create an account, go to Settings/Log Destinations and copy the connection URL.
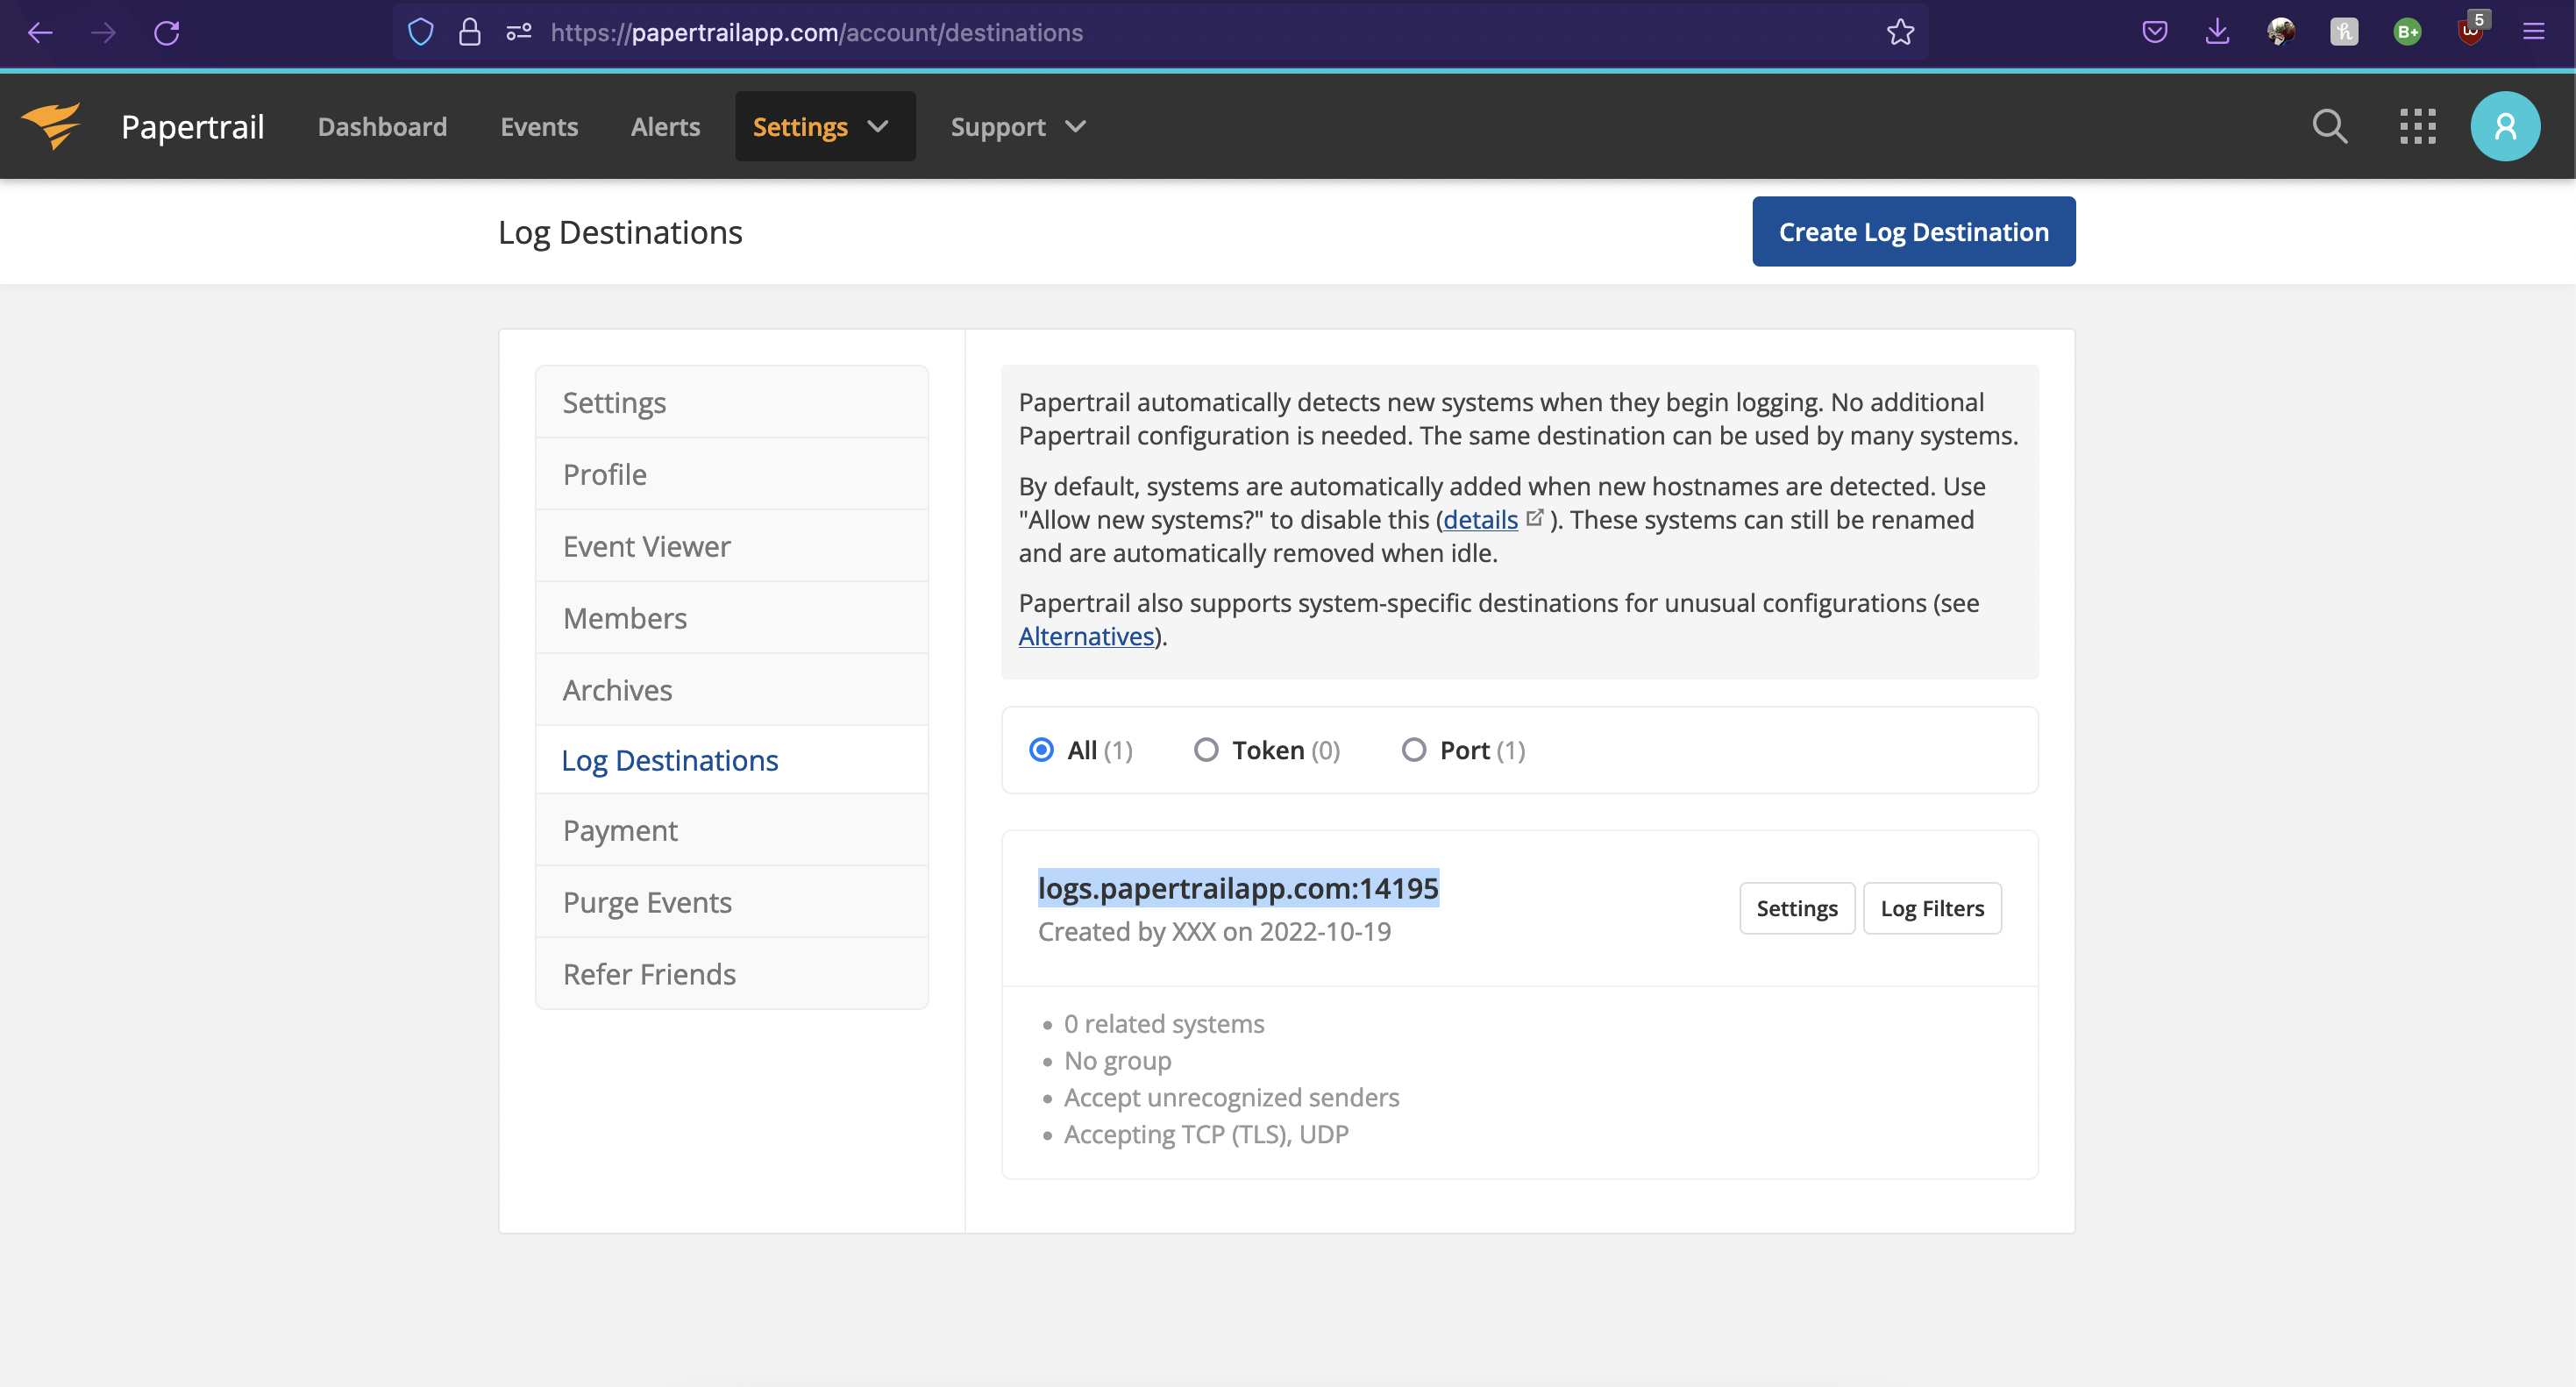
A valid one would look like logs5.papertrailapp.com:30016.
Paste it into the app config:
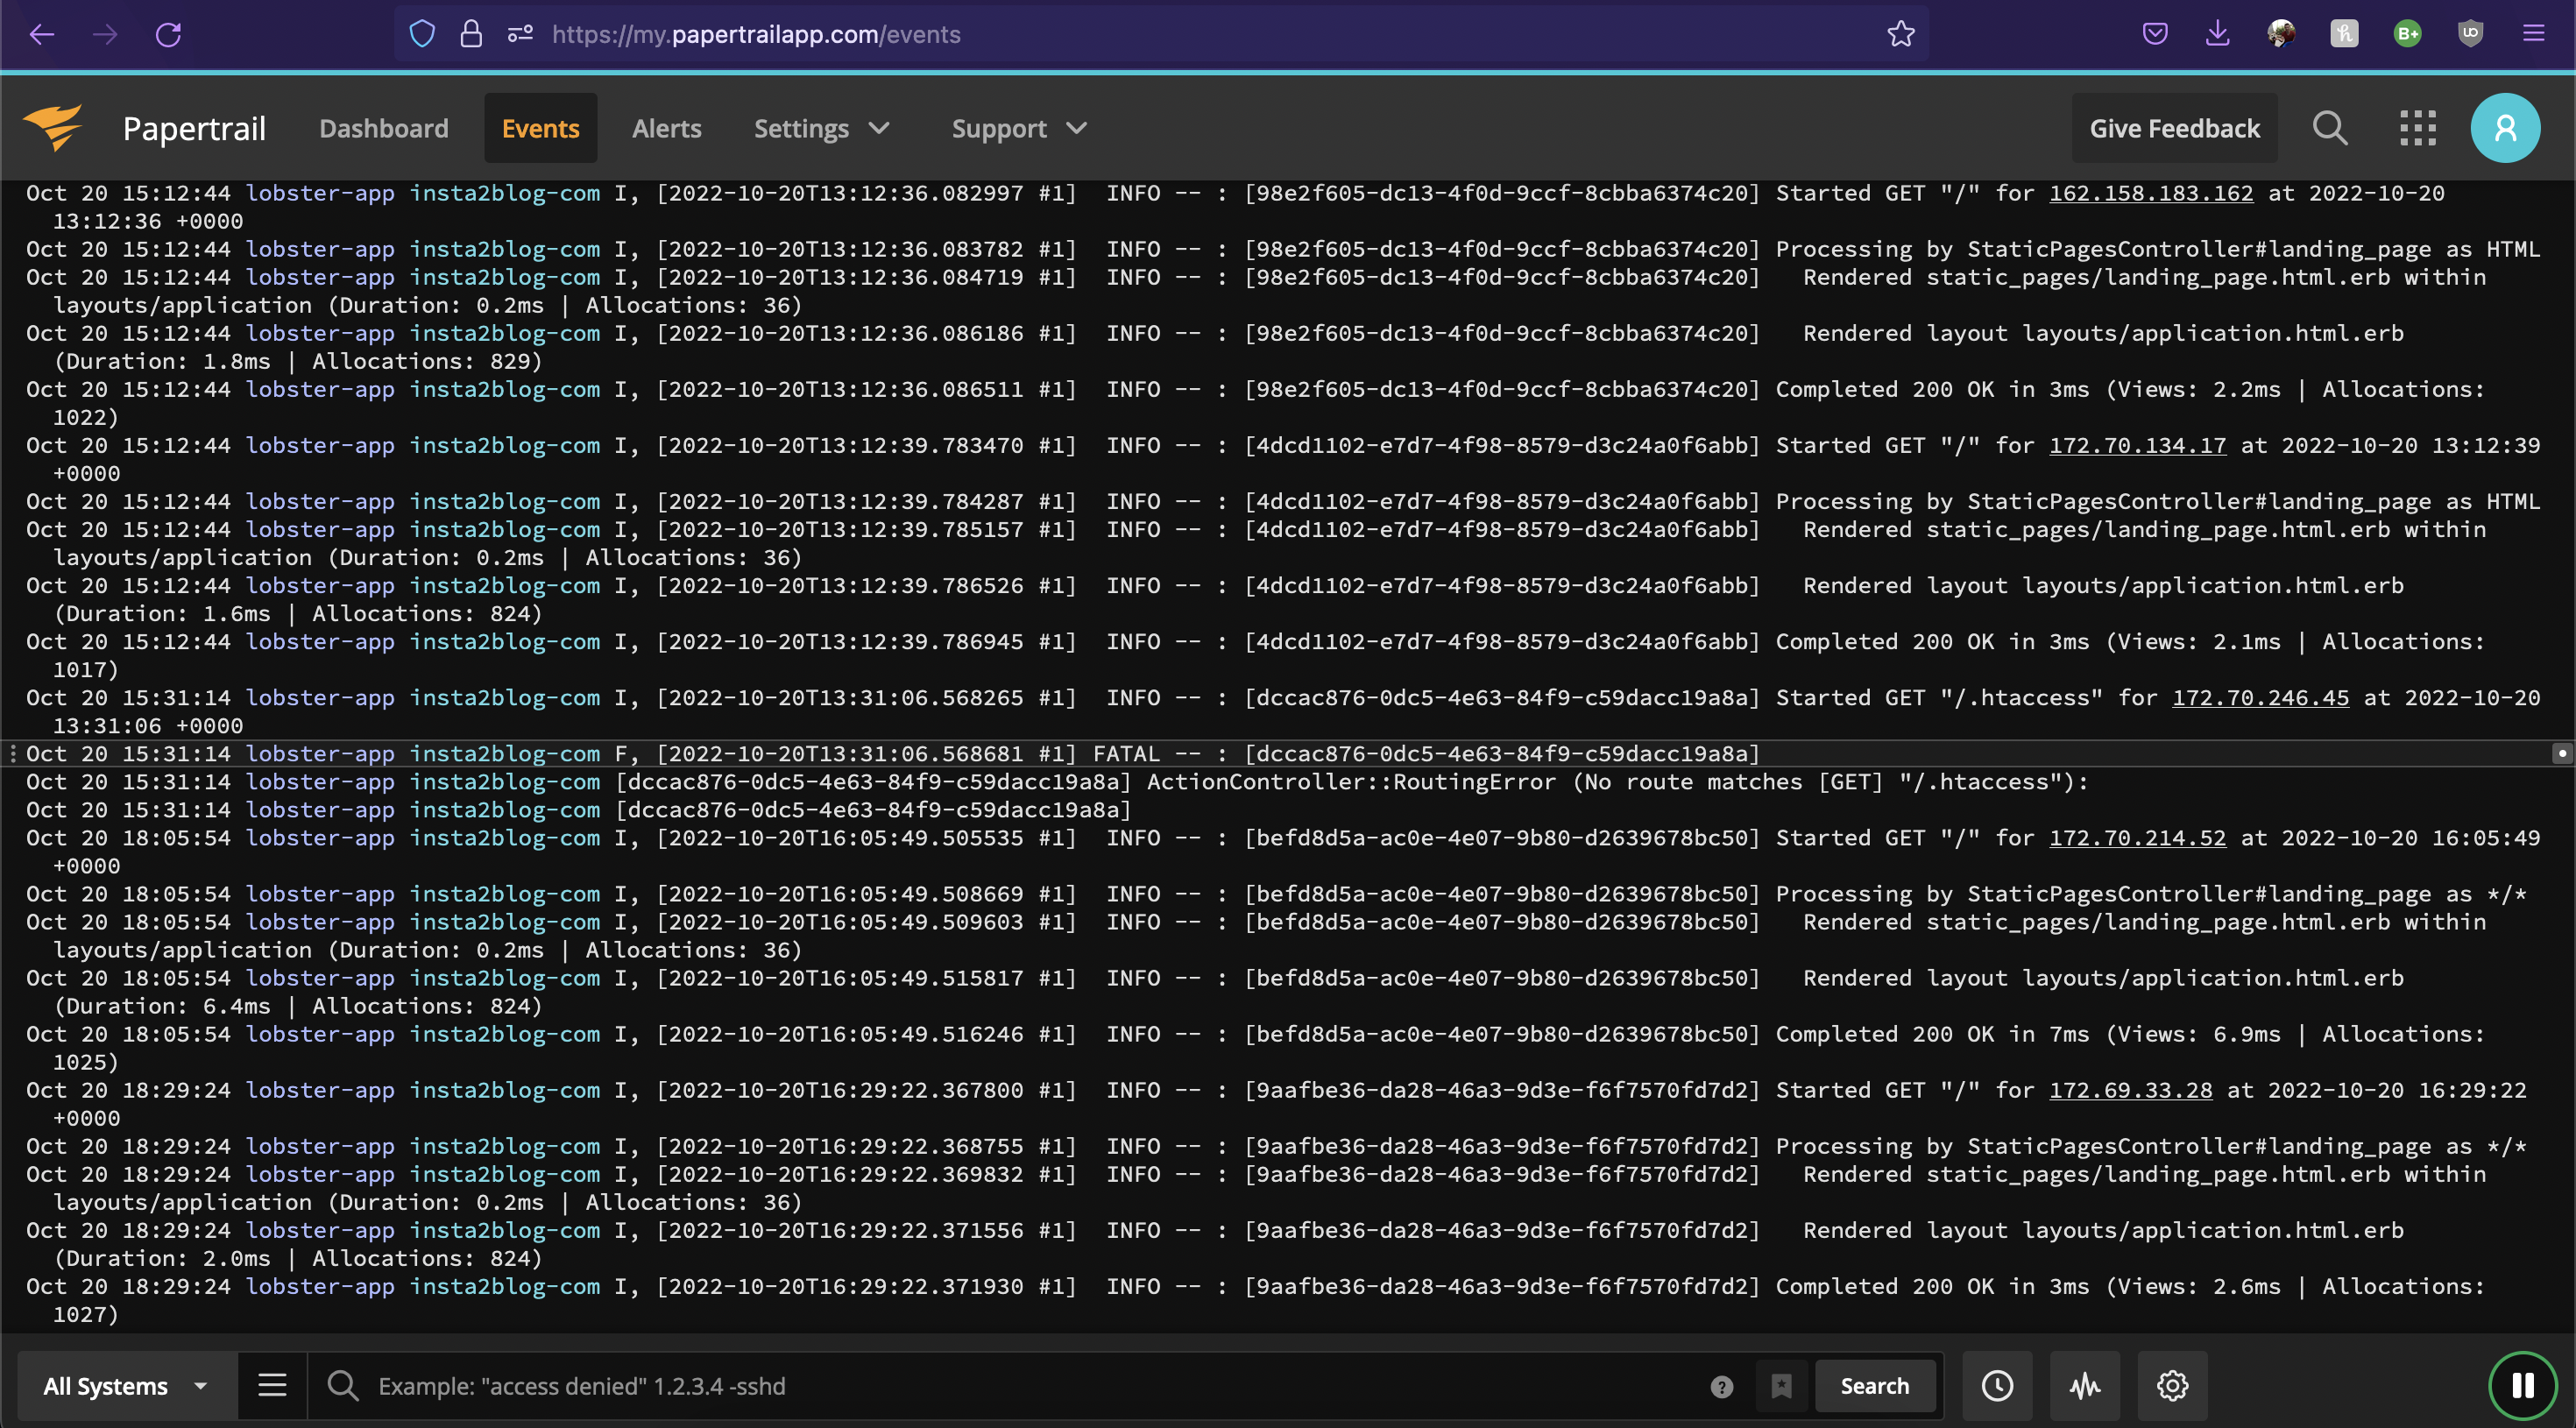
Now if you open your logs in papertrail, they will look somewhat like this:
Connect a domain #
Get CNAMES for yourdomain.com & www.yourdomain.com:
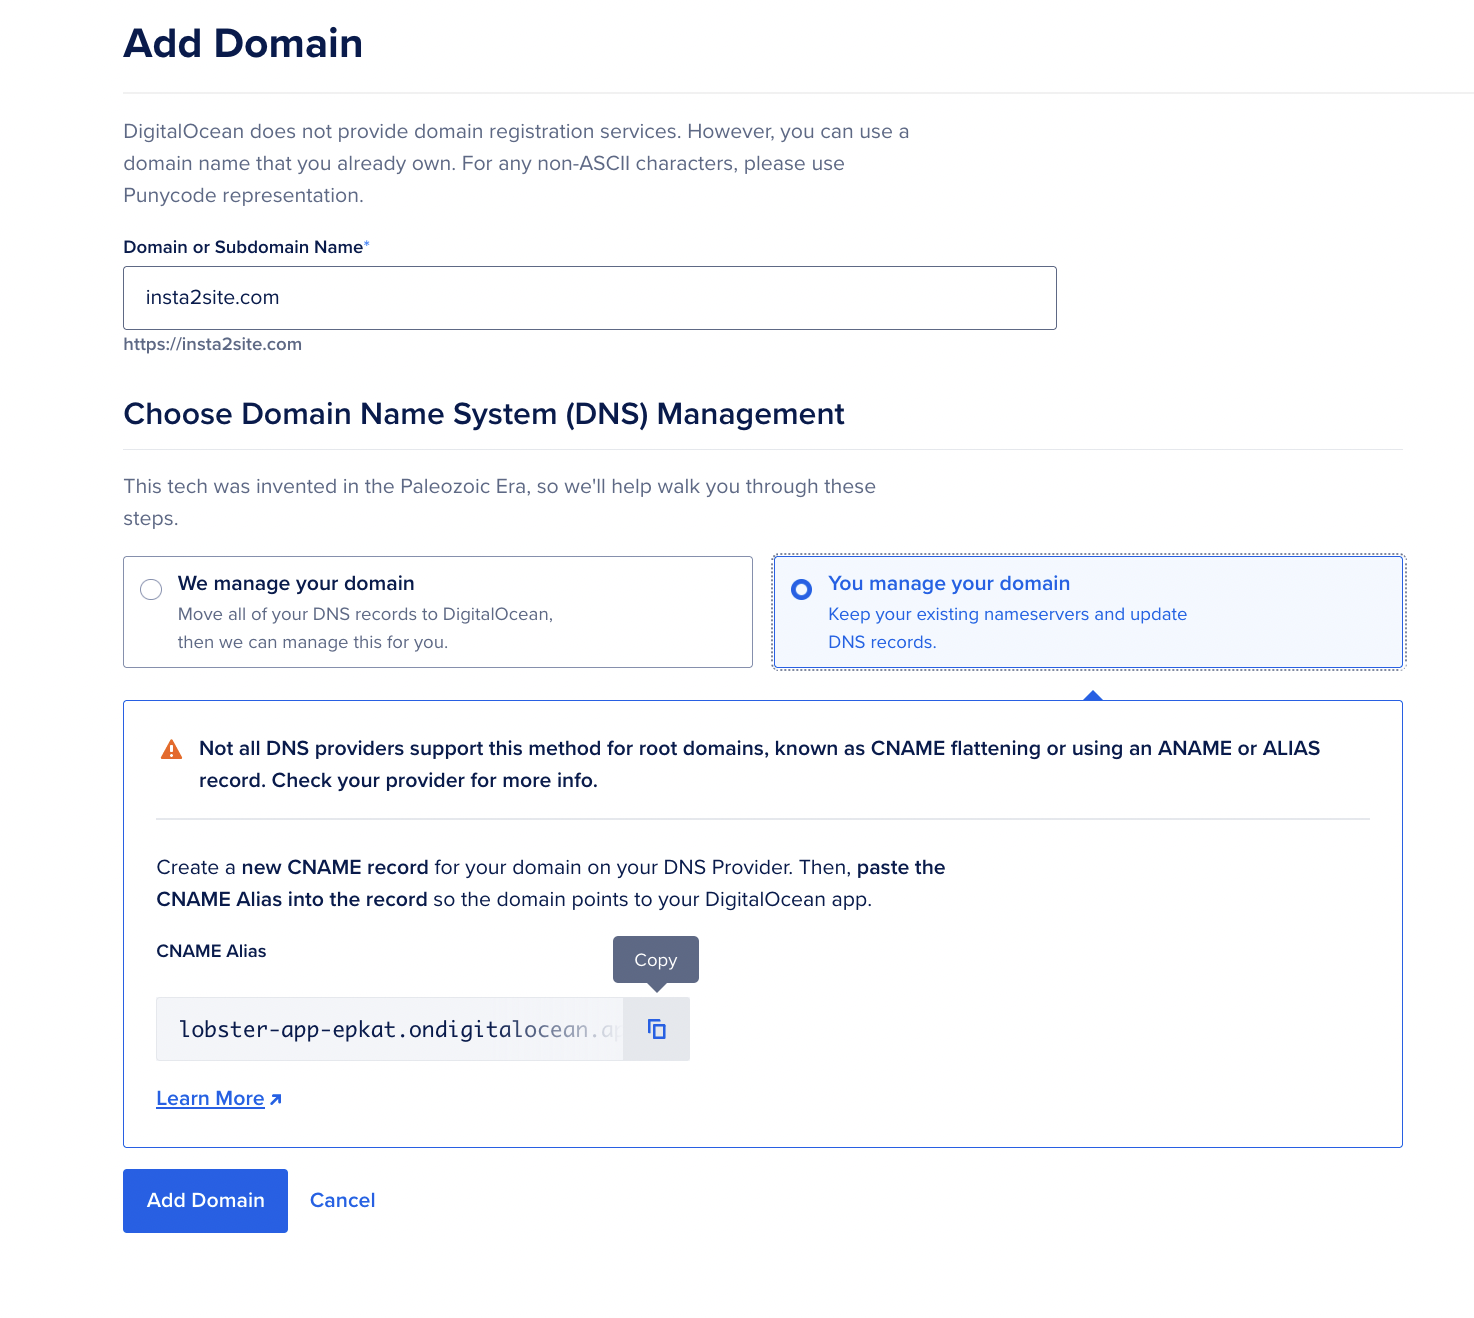
And add them in the domain name provider settings:
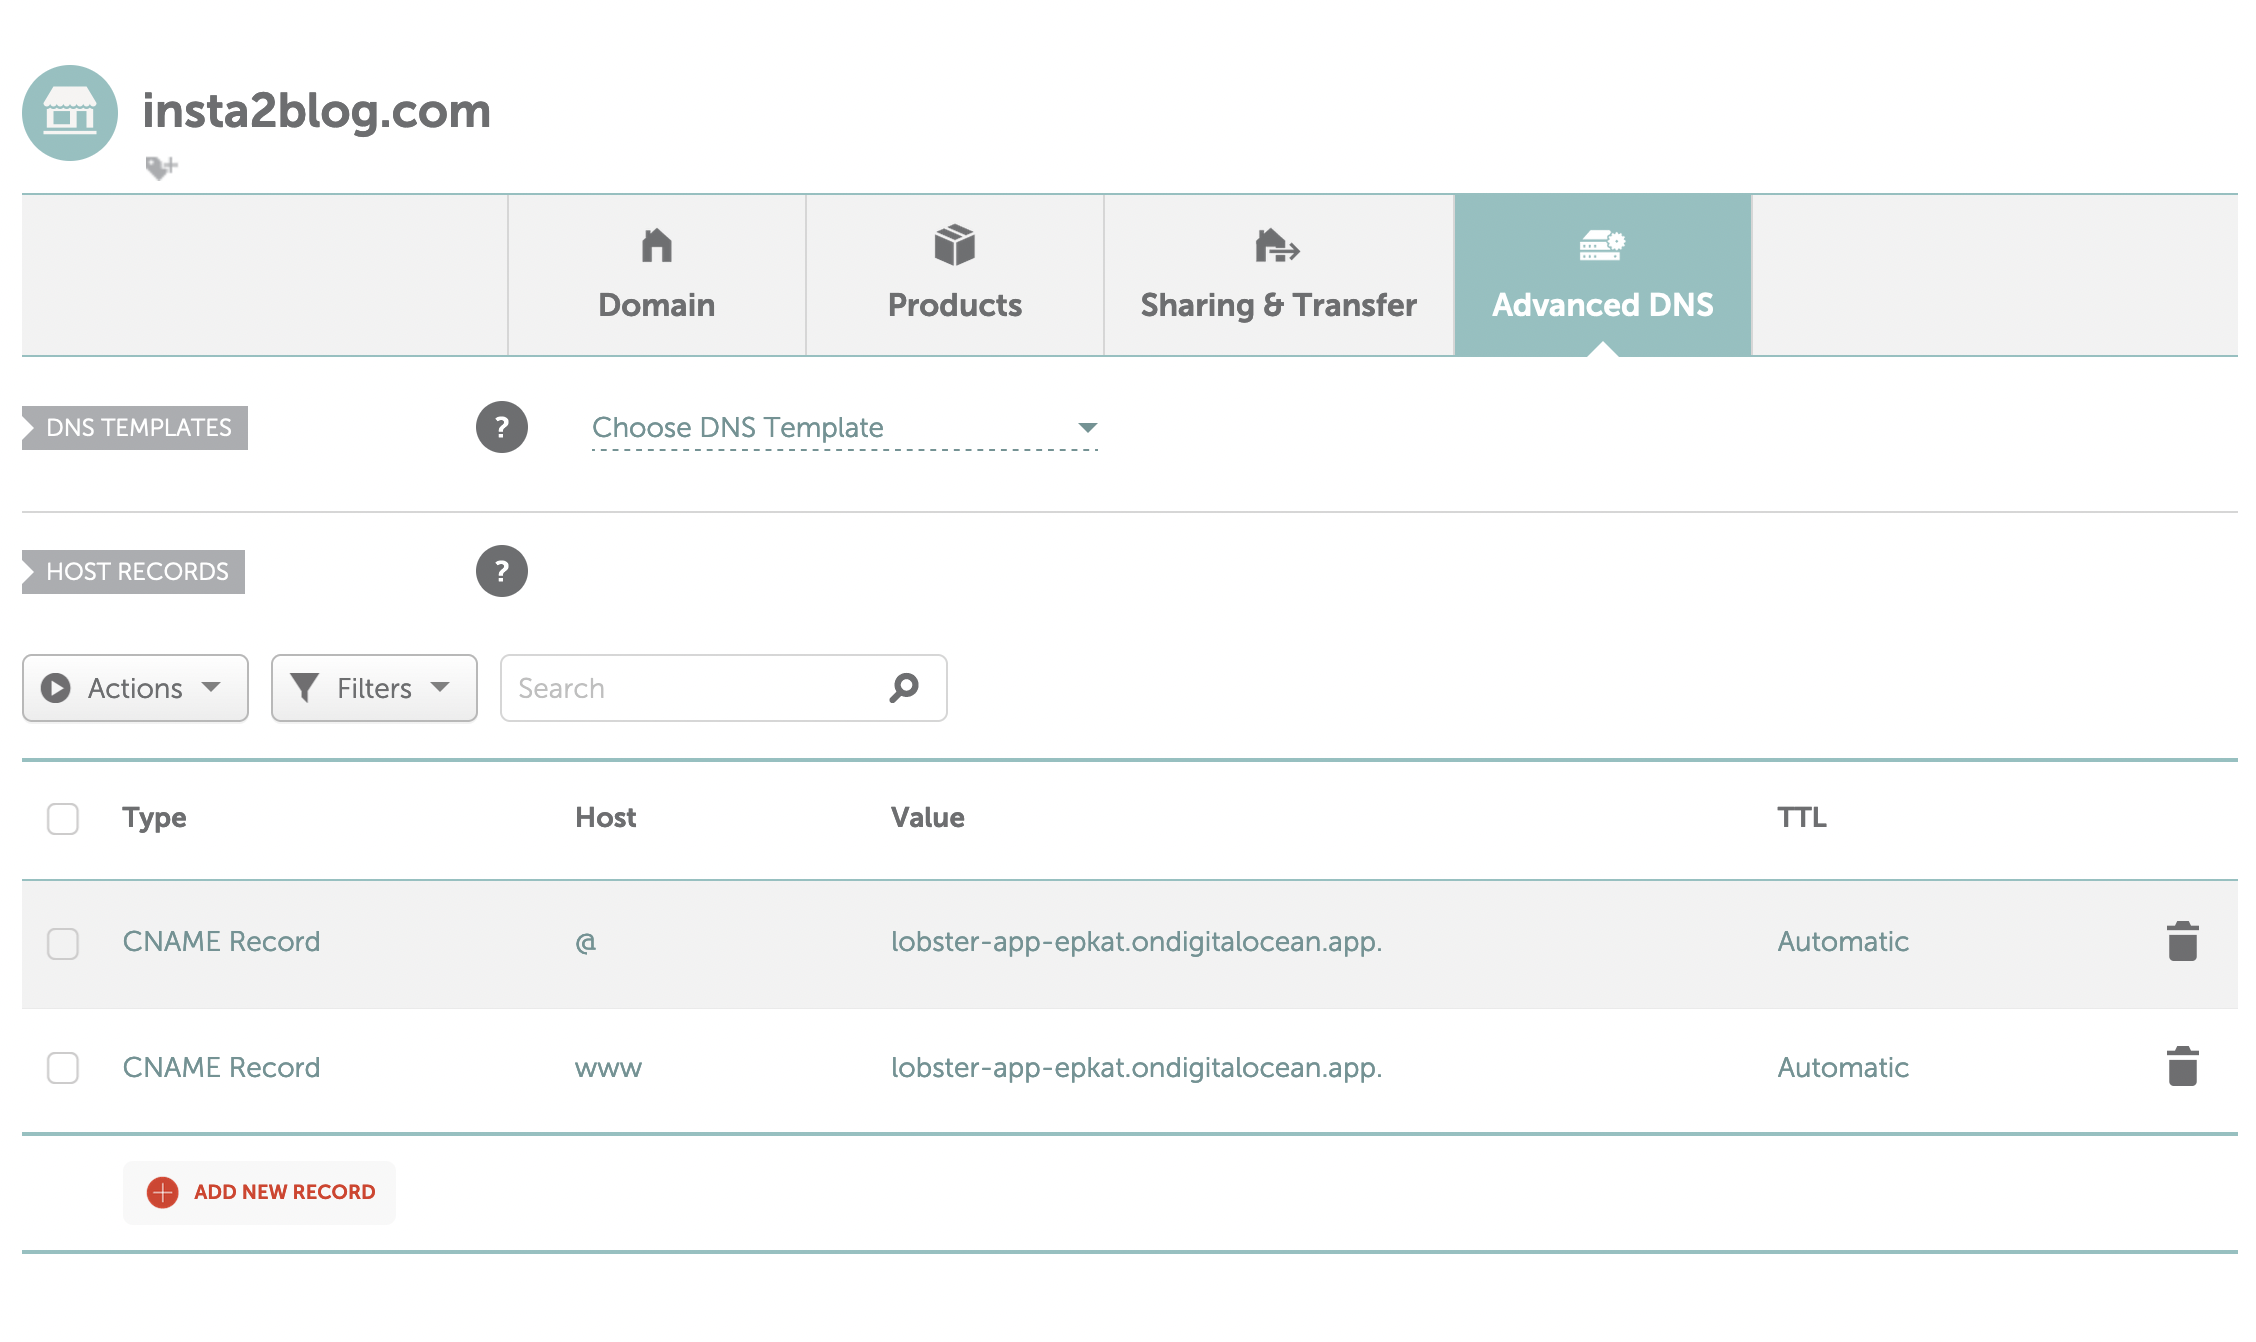
In a few minutes your domain should be working for your app!
Final thoughts #
DigitalOcean Apps similar to Heroku apps, but require a bit more config.
DigitalOcean Droplets are like AWS EC2 containers. They are cheaper than Apps, but require even more config (maybe worth deploying via Dockerfile).
Alternatives to DigitalOcean #
P.S. I am not paid by DigitalOcean for this post 😢
App spec #
Like an app manifest with all the DigitalOcean settings that I used:
databases:
- cluster_name: i2s-db-prod
  engine: PG
  name: i2s-db-prod
  production: true
  size: professional-xs
  version: "14"
domains:
- domain: insta2blog.com
  type: PRIMARY
- domain: www.insta2blog.com
  type: ALIAS
name: lobster-app
region: fra
services:
- environment_slug: ruby-on-rails
  envs:
  - key: RAILS_ENV
    scope: RUN_AND_BUILD_TIME
    value: production
  - key: RACK_ENV
    scope: RUN_AND_BUILD_TIME
    value: production
  - key: RAILS_LOG_TO_STDOUT
    scope: RUN_AND_BUILD_TIME
    value: enabled
  - key: RAILS_SERVE_STATIC_FILES
    scope: RUN_AND_BUILD_TIME
    value: enabled
  - key: RAILS_MASTER_KEY
    scope: RUN_AND_BUILD_TIME
    value: d23a37d23a37d23a37d23a37d23a37
  - key: DATABASE_URL
    scope: RUN_AND_BUILD_TIME
    value: postgresql://doadmin:d23a37d23a37@i2s-db-prod-do-user-d23a37-0.b.db.ondigitalocean.com:12345/defaultdb?sslmode=require
  github:
    branch: main
    deploy_on_push: true
    repo: yshmarov/insta2blog.com
  http_port: 8080
  instance_count: 1
  instance_size_slug: professional-xs
  log_destinations:
  - name: paper1
    papertrail:
      endpoint: syslog+tls://logs6.papertrailapp.com:12345
  name: insta2blog-com
  routes:
  - path: /
  run_command: |-
    bin/rails db:migrate
    rails server -p $PORT -e ${RAILS_ENV:-production}
  source_dir: /
That’s it!
Did you like this article? Did it save you some time?
